


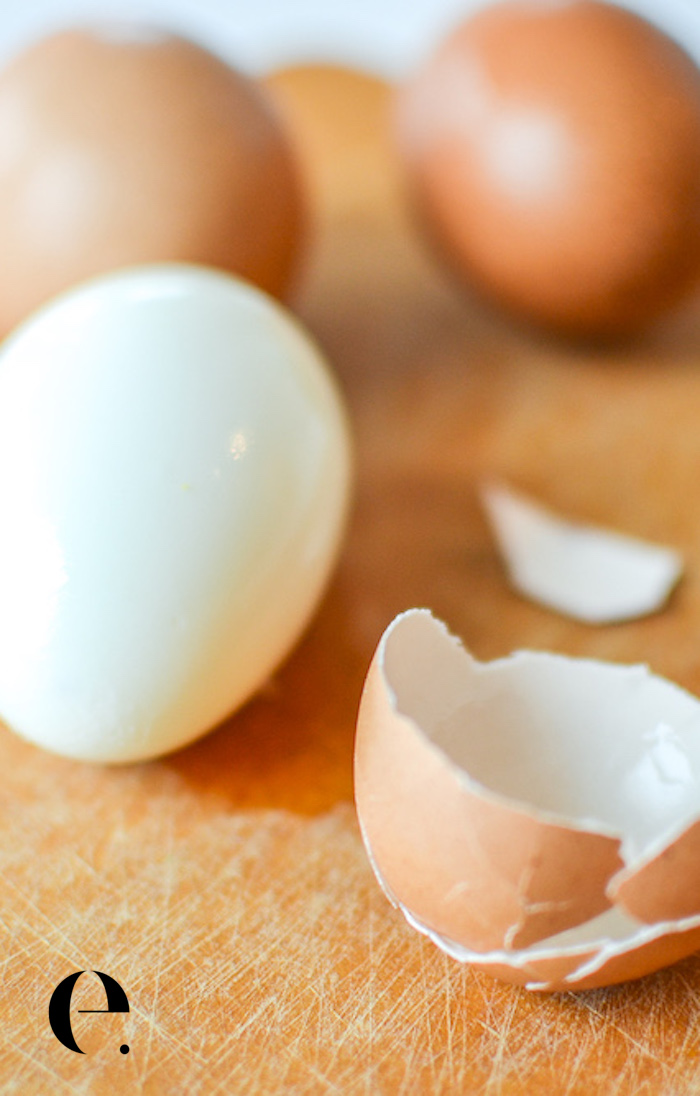
Get perfect, easy-to-peel, hard-boiled eggs every time with these simple tips and tricks. Say goodbye to frustrating peeling and hello to easy, delicious eggs!
You can use this hard-boiled egg recipe to make deviled eggs, egg salad sandwiches, or your favorite egg recipe.
After a lot of trial and error, I finally figured out the secret to making the shells fall right off of hard-boiled eggs. No more picking off tiny shell pieces or difficult-to-peel eggs!
Watch this video to learn how to make the shells practically fall off your hard-boiled eggs! 👇 Or, keep reading below…
Let me be the first to tell you… we’ve all been led astray on how to boil eggs.
Who else has been told to put the eggs in a pot, cover them with an inch of cold water, then bring them to a boil? Yeah, me too. But that’s where we’ve been doing it wrong.
Follow this process for boiling eggs on the stovetop (you can also watch this recipe on YouTube or print it out in the recipe card below), and I guarantee you will have the easiest-to-peel hard-boiled eggs you’ve ever made. You can also make hard-boiled eggs in the Instant Pot if you prefer.
#1: Easy-to-peel hard-boiled eggs are the result of a boiling hot start.
I think this “cold start” egg myth came from the fact that potatoes actually do need a cold start. When you give potatoes a cold start—meaning that you put the chopped potatoes in a pot, cover by an inch with cold water, then boil—you wind up with a better texture and a more even cook. (Tuck that away for the next time you make mashed potatoes!)
Because this cooking method is tried and true for potatoes, people have assumed the same with eggs. But that’s not the case! To make sure your hard-boiled eggs turn out perfect, you want to boil the water first, then reduce it to a simmer and gently lower in the eggs.
#2: Making easy-to-peel hard-boiled eggs requires shocking them in cold water after cooking.
After 13 minutes at a low simmer (not a boil—see full method below & read the tips to prevent cracking), immediately put the eggs in ice water to make them easy to peel. Shocking them in ice-cold water for 10-15 minutes stops the cooking process and helps the shell release from the egg white.
This not only yields more tender whites and a perfectly cooked yolk (no weird dark lines here), it immediately cools the eggs which makes them easier to peel.
You can shock them in a bowl of ice water like I do in this video, or if you’re feeling brave, strain the hot water from the pan and add ice and cold water to cover the cooked eggs (but you might crack them this way).

#3: Easy-to-peel hard-boiled eggs require a specific cooking time.
You don’t want the water at a full rolling boil for 13 minutes, or the eggs will be overcooked (and they may knock together and crack). The best method is to bring the water to a full boil and then reduce it to a simmer, carefully lower the eggs in (a slotted spoon, fine mesh strainer, or spider-skimmer work well), cover the pot, and keep them at a low simmer for 13 minutes.
After the water boils, turn the burner to low and keep them at a very gentle simmer.
None of these tips really take much effort—and trust me—it’s worth it for shells that practically fall right off the eggs.
Hard-Boiled Egg Cooking Times:
The general rule of thumb to make hard-boiled eggs is to (simmer) them for 13 minutes for a hard-boiled yolk. If you want a soft or runny yolk, decrease the cooking time.
How long do you boil eggs?
- Hard-boiled yolk: 13 minutes (extra large eggs will need 14-15 minutes)
- Medium soft yolk: 9 minutes
- Soft yolk (a soft-boiled egg): 6 minutes
The size of the eggs can also be a factor. Smaller eggs might take 11-12 minutes, while extra large eggs might take 14-15 minutes. I almost always keep them at a bare simmer for 13 minutes, and they always turn out great.
After boiling, let the eggs sit in the ice bath for at least 15 minutes, then peel them or refrigerate them (unpeeled) for up to seven days.
The ice bath quickly cools the eggs, preventing them from overcooking and preventing the dark ring from appearing outside the yellow yolk. The ice bath also helps the shells separate, making them much easier to peel.
To peel, gently tap the egg at the big end first, then the small end, then all around.
I prefer not to roll them because it’s easy to break the white. Just gently tap all around to crack the shells everywhere and they will peel with ease.
Easy-Peel Eggs Summary:
- Bring the water to a boil, then reduce it to a very gentle simmer
- Gently lower the eggs in.
- Keep the heat at the lowest setting and put a lid on the pan. Do not let the water boil again as the eggs may crack. If the water boils/simmers, turn the heat off completely.
- Cook for 13 minutes, then shock them in an ice bath for 10-15 minutes to make perfect, easy-to-peel, hard-boiled eggs.
Easy Peel Eggs FAQs:
Q: What about making a tiny hole at the top of the egg?
A: In my experience, making that tiny hole in the shell with a thumbtack actually does help—but only a little. If you don’t have a thumbtack handy, you don’t need to drive to the store to get one just to make easy-to-peel eggs.
However, if you already have one, use a thumbtack to make a tiny hole at the top of the big end of the egg before boiling (gently press and it will go right through the shell). The shells will be that much easier to peel.
Q: Do I need to cover the pot?
A: I generally do cover the pot, but I’ve forgotten to cover it before and they still turn out great. There are other methods that call for turning off the burner while the eggs sit in the hot water. If you turn off the burner you definitely want to cover the pot to trap the heat in. But, if you do it as I explain on this page and keep the burner on the lowest setting, it’s not always necessary.
There are other methods out there that call for salt or vinegar in the water. I tried both (multiple times!) and didn’t find that either trick made a difference. So, save your salt and vinegar for other recipes.
Tips to Prevent Cracking
Post update: Since publishing this blog post last year, it’s quickly become a top Google search result. And, while an overwhelming majority of you have commented that this method works perfectly, a few of you have commented below that your eggs cracked.
This can be for two reasons:
Mistake #1: The pan is either crowded or it’s too big.
Be sure not to overcrowd the pan. Your eggs need a little room to groove. They should not be on top of each other or packed in tightly. There needs to be enough room to allow a single layer of eggs in your pan while they cook, but not so much room that they’ll roll around. Watch this video to see how to choose the right-sized pan.
If they crack while cooking, it may be because they are too crowded.
Mistake #2: Super fresh eggs crack more easily.
And finally, don’t use super fresh eggs for your hard-boiled eggs.
This is probably the only time in the kitchen that day. Fresh isn’t best. Shells like to really stick to just-laid eggs. If you have your own chickens or buy directly from a farmer, use those eggs for a glorious scramble or poach ’em up.
If you buy your eggs at the grocery store, they’re already a few weeks old so they’ll work great. In the US, eggs are refrigerated because they are power-washed before packing. Of course, don’t use expired eggs.
You do not need to bring them to room temperature; you can use this method with eggs straight out of the refrigerator.
Need to learn how to make deviled eggs? You can do that right here with my deviled eggs tutorial.
Print
Perfect Easy-to-Peel Hard-Boiled Eggs
- Prep Time: 5 minutes
- Cook Time: 15 minutes
- Total Time: 30 minutes
- Yield: varies
- Category: Breakfast, Eggs, Snacks
- Method: Ice Bath, Simmer
Description
This easy-to-peel hard-boiled egg post is a #1 Google search result for a reason–it works! Read the recipe notes below to prevent your eggs from cracking. If you love this recipe, give it a 5-star rating in the comments below to help other readers.
One reader recently commented, “I deployed your method just yesterday and the results were stunning! Not only did the shells just “slide” away – the eggs were gorgeous.”
Ingredients
- Eggs (obviously!)
(Super fresh eggs crack easily, so try to use “older” but not bad eggs. Read the notes below.)
Instructions
- Bring a pot of water to a full boil. Use an appropriate-sized pot that will fit your eggs. I use a 2.5-quart pot for six eggs.
- If using, use a thumbtack to make a tiny hole at the top of the big end of the eggs. (See note.)
- Gently lower the eggs into boiling water. A fine mesh strainer or spider-skimmer work well for this.
- (Tip from a reader comment: “I took my boiling water off the burner and let it settle a moment and then gently lowered my eggs. Worked great! I had several broken eggs on my first batch when I put the eggs in while the water was at a rolling boil. Hope this helps someone because this recipe is a game-changer!”)
- Once the eggs are in, keep the burner on high for 30 seconds (so long as the eggs aren’t knocking together), then turn the burner to the lowest setting for a very gentle (not rolling) simmer. Cover the pan with a lid and wait 13 minutes.
- Put the eggs in an ice bath. You can do this by filling a separate bowl with water and ice, and transfer the eggs, or, gently pour the water out of the pan without cracking the eggs, then fill the pan with cold water and ice. The first way, with the bowl, is easiest to prevent accidentally cracking your eggs while they are hot.
- Leave the eggs in the ice bath for 15 minutes.
- Peel and use right away, or store unpeeled eggs in the refrigerator for up to 7 days.
- To peel, gently tap the egg at the big end first, then the small end, then tap all around to gently crack the shell. Be amazed at how easily they peel.
Notes
Tips to prevent cracking:
- Tip to prevent cracking #1: Be sure to not crowd the pan. Your eggs need a little room to groove. They should not touch or be on top of each other. There needs to be enough room to allow a single layer of eggs in your pan while they cook. If they crack while cooking, it may be because they were too crowded.
- Tip to prevent cracking #2: Don’t use super fresh eggs for your hard-boiled eggs. This is probably the only time in the kitchen that day-of fresh isn’t best. Shells like to really stick to just-laid eggs. If you have your own chickens or buy directly from a farmer, use those eggs for a glorious scramble or poach ’em up. If you buy your eggs at the grocery store, they’re already a few weeks old so they’ll work great. In the US eggs are refrigerated because they are power-washed before packing. No need to bring them to room temp, you can use this method with eggs straight out of the refrigerator.
- Make sure you have a single layer of eggs in the pan. If you try to stack eggs or stuff more in the pan that fit, the water won’t be hot enough to cook the eggs. I use a 2.5 quart pot for six eggs, which is about 6.5 inches in diameter.
– In my experience, making that tiny hole in the shell with a thumbtack actually does help—a little. If you don’t have a thumbtack handy, you don’t need to drive to the store to get one just to make easy-to-peel eggs. But, if you do have one, use a thumbtack to make a tiny whole at the top of the big end of the egg before boiling (gently press and it will go right through the shell). The shells will be that much easier to peel.
– Unpeeled eggs can be stored in the refrigerator up to 7 days. I suggest storing them in an airtight container to prevent odor in your refrigerator.
– Tip: While I’m not for wasting food, if you are unsure of your cooking time, you may want to cook 1 extra egg and test it by trying to peel it to check the inside before shocking it in the ice bath. It won’t be as easy to peel because it hasn’t gone into the ice bath, but it will let you see the inside to know if it’s cooked to your liking.
Looking to use your easy-peel eggs?
Check out a variety of deviled eggs recipes:
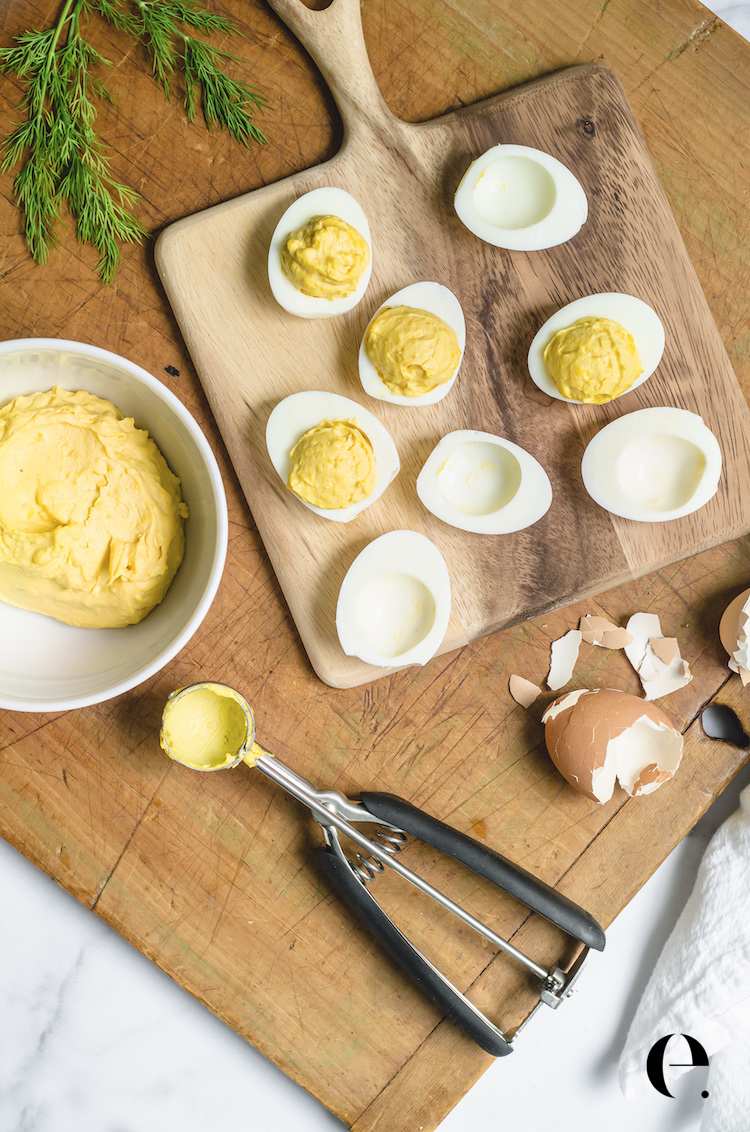
How To Make Classic Deviled Eggs
This easy recipe for deviled eggs is a staple in American cooking. Make the classic just as written, or get creative with add-ins and toppings.
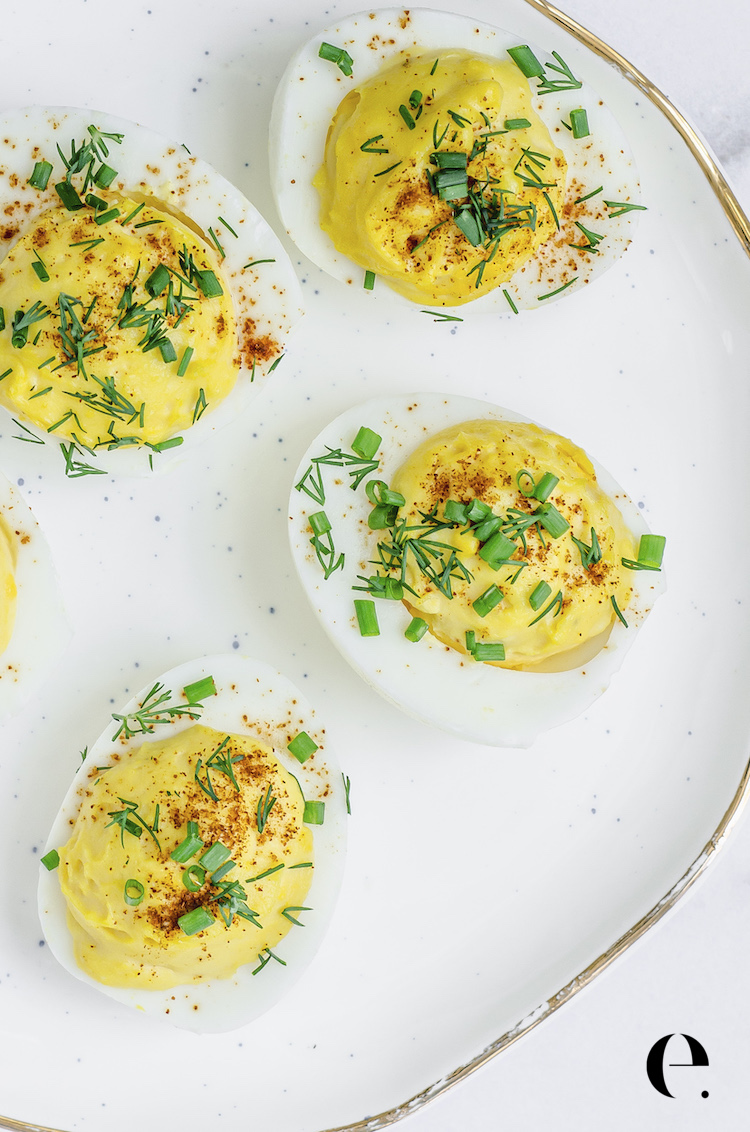
Chive & Dill Deviled Eggs
I love the spicy kick and crispy crunch of these Jalapeno Chive Deviled Eggs on any appetizer spread.
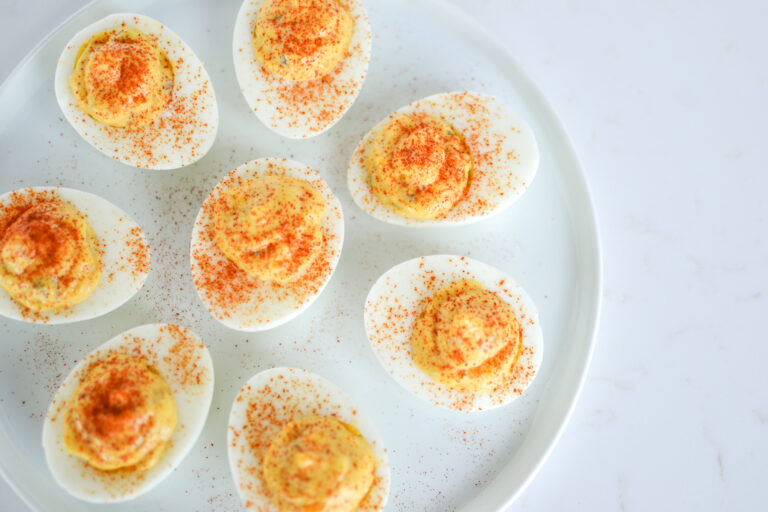
Secretly Healthy Deviled Eggs
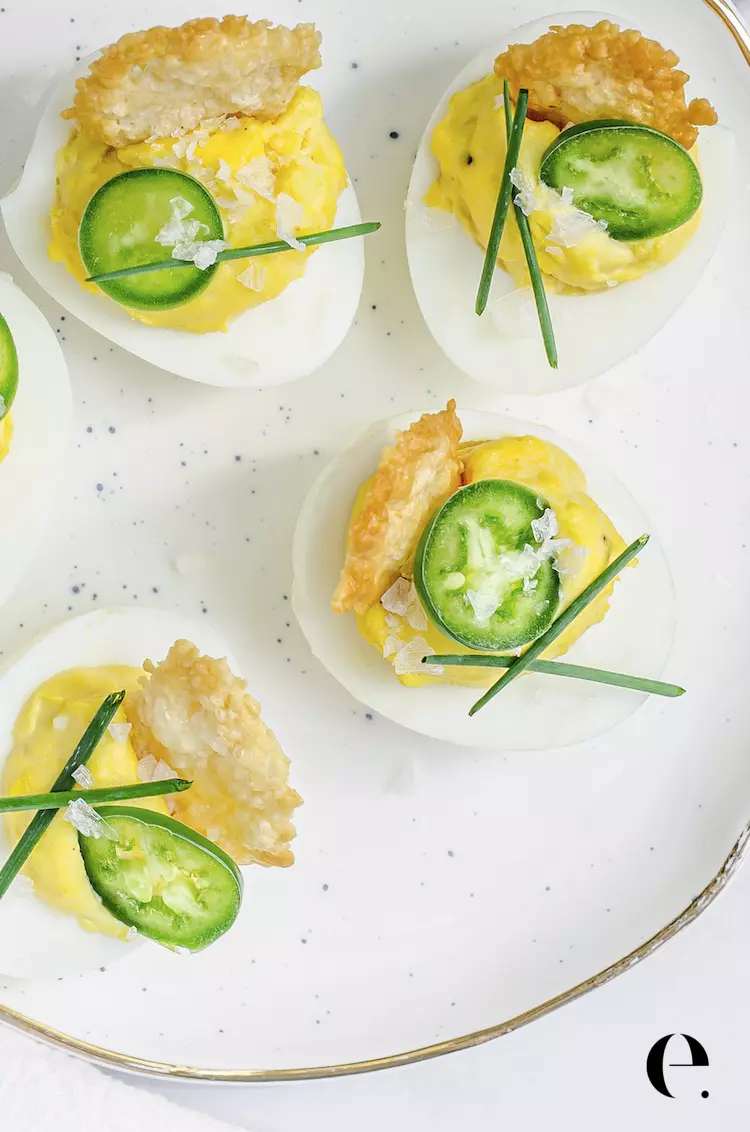
Fancy Jalapeno Chive Deviled Eggs with Parmesan Crisp
I love the spicy kick and crispy crunch of these Jalapeno Chive Deviled Eggs on any appetizer spread.
Or, use your easy-to-peel hard-boiled eggs for a delicious egg salad:
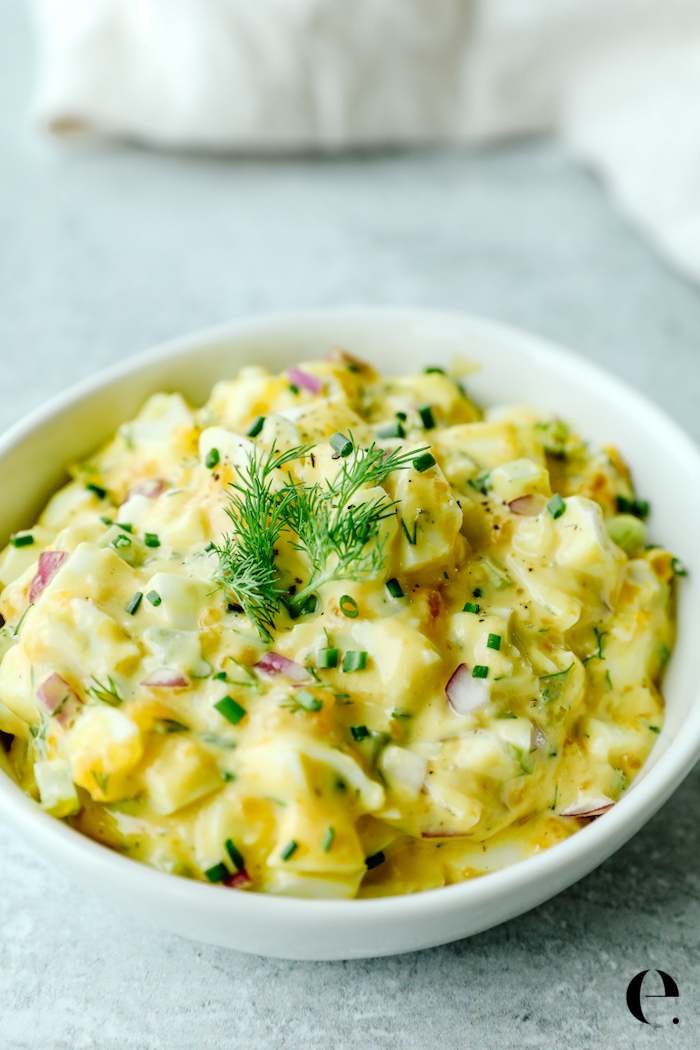
Chive & Dill Egg Salad Recipe (Amazing on Sandwiches!)
This is my all-time favorite egg salad recipe for sandwiches. It comes together in about 10 minutes if you already have hard-boiled eggs, and less than an hour if you need to boil the eggs. The fresh dill really makes it, so use it if you can find it. If you don’t have any fresh herbs on hand, this egg salad recipe is still great. If you like it, please leave a star rating in the comments to help other readers in our community.
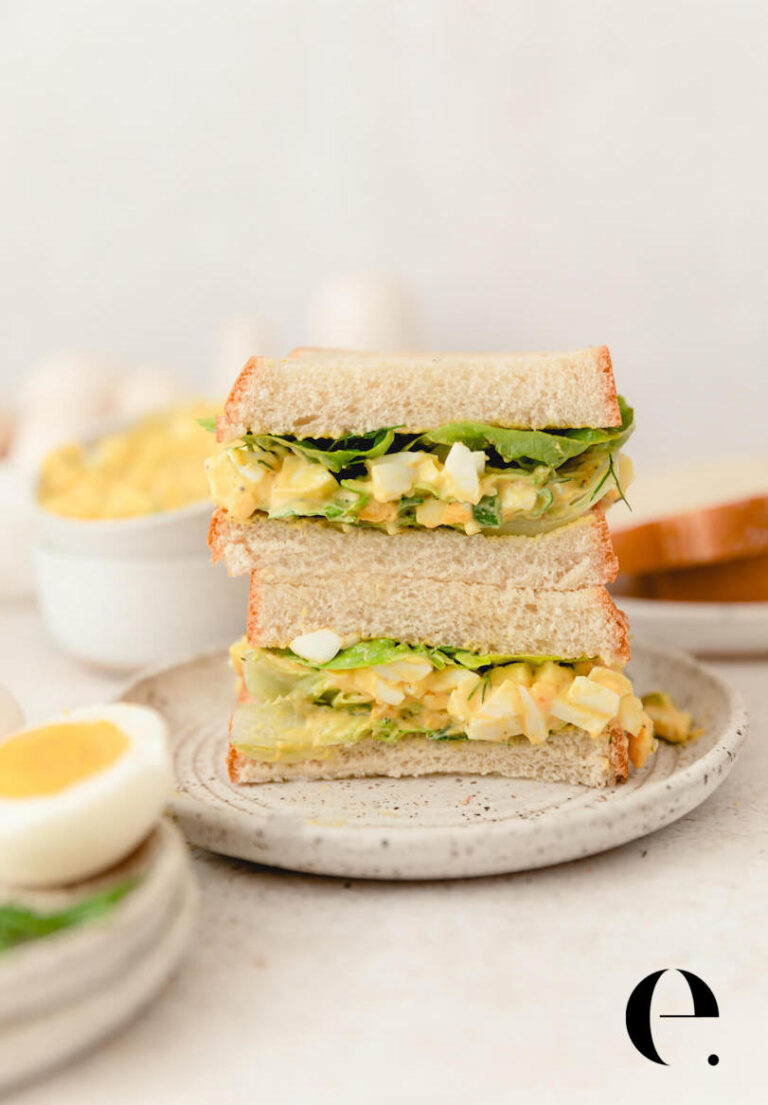
How to Make Egg Salad for Sandwiches
Once you learn how to make egg salad you’ll always have an easy meal a few minutes away. If you already have hard-boiled eggs it takes just 10 minutes and is easy to make and beyond satisfying. Serve it on toasted bread for a healthy lunch or serve it alongside crackers for the perfect appetizer.
What do you think? Have you tried this method or others? Let us know how they turn out in the comments below.
")


")
There are several of this “recipe” online. However, this one includes tips important to the success of truly easy peel hard boiled eggs that other don’t and those tips do make a difference.
Hi Bonnie, agreed! Thanks for taking time to comment. 🙂 ~Elizabeth
Oh my goodness!!! I have been peeling eggs for years without problems and then enter farm fresh eggs. I have had problems ever since until today!! I have tried many methods and your worked perfectly!! I used 1-2 week old eggs and they peeled PERFECTLY!!! The shell almost fell off of some of the eggs. I have been pre-boiling my water since day 1 but I think the trick is the long ice bath! I put the first egg in the water and it immediately cracked, so for the rest of them I used the puncture method and the rest were perfect!!! Thank you!!
So glad to hear it! 🙂
So glad to hear it! I agree, learning how to make hard-boiled eggs easy to peel is life-changing 🙂 ~E
You are amazing! This trick for easy peeling is amazing! I’ve never had such a calm and joyful experience peeling my eggs! As an adult who loves egg salad sandwiches and deviled eggs but hates peeling eggs…this has changed everything!
Thank you for sharing!
Glad to hear it!
I tried this today and I am thrilled to say it worked perfectly. It does not differ too drastically from other methods I have used, I think the biggest difference is the ice-water bath for 15 min. and also, putting the eggs in already boiling water. I am using 1-2 week old brown eggs from our own chickens, and all other methods have yielded messy results. This will be my go-to method here on out. Thank you.
My egg yolks were not completely cooked. I used large eggs and followed the directions exactly EXCEPT I did not return the water to a boil after putting the eggs in. I was making deviled eggs so I had to improvise, finishing cooking the yolks in the microwave for a few seconds. The consistency of the filling was a little grainy. The eggs were not any easier to peel than the old way I was doing them. I will try again with a smaller batch making sure they return to a boil then turning the heat down before I give up on this method.
I have tried multiple methods I have read online to hard boil eggs and get them to peel easily. This method worked PERFECT! What a save of unnecessary frustration! Thank you!
BTW, I used the thumbtack puncture trick.
This long-winded guide does not work. Followed it precisely and the shells stick to the eggs and only peel with huge chunks of eggwhite coming off with them. Ruined 6 eggs.
Also, this influencer doesn’t seem to be engaging with the commenters who report bad outcomes. Not cool, Elizabeth.
This method worked perfectly for me! They eggs cooked beautifully and peeling was so easy! I’m so happy I stumbled across your method. Thank you!
The first time I tried all of my eggs came out runny almost like liquid. I thought maybe I didn’t do it right so I gave it another try. I followed to a T. Another disaster. I’ve ruined a 14 eggs. What a waste!! It was the worst recipe.
I’ll go back to use my instanpot.
Just tried it and it worked perfectly. Thank you! I’ve been using the wrong method and have been annoyed for so long.
Terribly undercooked eggs. They were easy to peel but not done enough.
It worked! So easy to peel. I lost 3 out of 24 to immediate cracking “pop” when I gently placed them in the boiling water. So maybe next time won’t start with cold eggs. On the bright side: I had a nice breakfast of warm boiled eggs with tender firm whites and pretty yellow yolks. Thank you.
Agree. I lowered them soooo carefully, but could hear them crack in just a few seconds. My eggs were at room temp also. In a few sec it was like egg drop soup over here.
Recipe owner:: Any explanation and/or tips?
This was a bust for me. Followed it step by step for Easter eggs and every. Single. One. Cracked. 🙁 This is a no-go!
I’ve been struggling with my “egg-cooker” and getting crappy results. I don’t recommend poking a hole in your egg, but otherwise this recipe made for perfect hard-boiled eggs. I’ll never do it any other way, now.
I had 4 eggs break and ooze the insides out in my boiling water. Think I’m going back to hard to peel eggs and starting with cold water.
I followed you directions to the letter. I was using jumbo eggs so I added a min. to the simmer time. All were perfect! I had been using the cold water method with varying results. This is much better. THANKS!!
Glad to hear it! 🙂 ~E
UNBELIEVABLE!! I’ve NEVER had eggs peel so easily or cook so perfectly. This process is amazing!! Ann
Preheat eggs in hot tap water before placing in boiling water for easier peeling.
Especially important in Australia where eggs are refrigerated.
I followed directions and it worked fine since I was making egg salad not deviled eggs. The problem I had was a couple of the eggs cracked (popped) and leaked the minute I spooned them into the boiling hot water. Next time I will get the eggs to room temp first and hopefully that will fix the issue. I set the timer for 13 mins and they were perfectly cooked.
Holy crow with the pop up ads… literally so many it’s painful and frustrating to try to read. Good tips ruined by marketing wolves trying to make a cent.
You should take this down!! It was the first easy to peel site that came up so I thought it would be the most popular! Christmas Eve, last dozen eggs, no stored left open and my eggs are ruined!!!! I wish I knew how to post a picture of the disaster!! I followed this recipe to the letter!! Even did all the tips!! Guess I’m not having deviled eggs for Christmas!!
This absolutely works!! Recommending this method to everyone I know 🙂
Works Great! Thank you for posting.
Glad to hear it! 🙂 ~E
I tried every trick out there and can never get good hard-boiled eggs that would peel. Follow the directions to a T. Bring water to boil place eggs in very gently with a spoon. Bring back to boil for 30 seconds turn down to simmer boil for 13 minutes. Get them in Coldwater right away. I was shocked how the shelves were falling off. I’ve done five dozen eggs now, haven’t had one cracked shell. The yolks are perfect.
Got my water to a rolling boil, gently placed my dozen eggs in the pot, boiling for close to a minute, turned stove to the lowest setting, simmered on L on my electric stove for 15 minutes, then into an ice water bath for an hour. My egg whites were slimy and the yolks slipped out of the shells.
I was able to buy peeled eggs at WinCo. That did the trick for me. A bit pricey though.
It most likely didn’t work because it doesn’t sound like you followed her directions at all.
I think the diet of the chickens that laid the eggs might have something to do with it. Somtimes your method works and sometimes not. When I was a child, my mother and my sister always made easter eggs that peeled almost in two halves with no problem. They are both deceased so we can’t ask them how they did it. The process started with my going out and gathering the eggs on Saturday morning. They made the easter eggs sometime after I returned with the eggs. And, yes, some of them weren’t even cooled off yet. I really hated trying to get the eggs away from those fiesty old hens! I never had an easter egg that the shells didn’t almost fall off. I never payed any attention to the cooking process so I have no clue how they did it.
I, too, followed this recipe to a T, but had a very difficult time with peeling the eggs.
It is a great recipe. Thanks alot!
I am 57 years old and for the first time in my life I have easy to peel eggs EVERY TIME! Thank you! We have chickens so LOTS of eggs! Note: store bought eggs can be months (not weeks) old so check the date, not the “use by” but the 3 digit DOY date (January 1st being number 1 and December 31st being number 365) located above/below the “best by” date. : )Thanks!
Glad to hear it, Meg! Thanks for leaving a comment to let us know 🙂
Hi…I followed your recipe EXACTLY for easy to peel hard cooked eggs. After a 24 egg disaster using the cold water method I went searching on the web and found yours.
8 eggs, absolutely PERFECT….shells slipped off and the eggs looked terrific. I even quoted your method as a reply to the cold water method! Thanks so much…we’re big pickled egg fans and didn’t indulge because of the hassle of PEELING EGGS! You solved my problem….thanks so much! Cheers Marilyn Schultz
I am an 81 year old male, tried your method three times so far..and absolutely perfect eggs. Bad part. Now my wife has assigned boiling and peeling eggs to me as another one of my jobs.
The Chief
Hi LW, thanks for letting us know! I think your wife is onto something 😉 I’m glad to hear this works well for you. ~Elizabeth
I have been struggling lately with peeling hard boiled eggs and was actually starting the eggs in the cold water when I decided to look up what can you do to make it easier to peel hard boiled eggs. I took those eggs out of the water, tried this method, and what a relief! Those shells came right off.
First time ever did I have eggs that peeled! We have chickens, so our eggs are really fresh. I followed the instructions and still got perfect eggs! I have tried everything to get my eggs to peel and this is the only thing that actually worked. Really enjoyed my egg salad sandwich.
Glad to hear it!
Perfect
I followed to a T but it did not work for me. The yolks were like jelly and they were impossible to peel.
Me too!!
This was an epic fail. When I very carefully lowered the eggs into the boiling water, every single one of them cracked IMMEDIATELY. Common sense now tells me that the eggs MUST be at room temp. Cold eggs Hot water=cracked eggs.
This the correct way to hard boil eggs (13 minutes max)and not only get them to peel easily but also get beautiful yellow golden firm yokes without a dark ring around them. if your eggs are cracking as bad as you experienced get better eggs or not fresh eggs and don’t boil your water as if it is an erupting volcano! Out of a dozen eggs I get at most two cracked, most of the time none. I landed on this method by lots of trial and error before I read Elizabeth’s method and I heartily endorse her method.
This is TERRIBLE advice for boiling eggs! Just for giggles, I tried it, and exactly what I thought would happen happened; every single egg cracked as soon as it hit the water. You cannot add a cold egg to boiling water. It’s going to crack. It has absolutely nothing to do with the freshness of your eggs, but it’s literally the science of mixing cold and hot. I have not cracked an egg while boiling it in YEARS. The eggs need to be added to cold water. It’s a shame that this is coming up so high in a Google search, with such terrible information! Do not use this advice to boil your eggs!!
LIES, LIES, LIES!!! It is Christmas Day, No stores are open to buy more eggs. I am in charge of two dishes today and I have 7 acceptable eggs out of 16 for my deviled eggs. I had bought these a week ago to have older eggs. I didn’t salt my water because you said it’s no use. I usually hard boil them for 25 minutes and usually only have a couple unusable ones. Don’t trust the internet, people. No Fail – Failure!!!!!!!!!!!!!!!!!!!!!
Me too. Followed directions exactly…did not pin prick the ends before cooking, and I’m off to get another dozen eggs, and these will go in salads or egg salad….too ugly to serve. UGH!
Hard boil for 25minutes???!!! No way. I call BS. If you seriously hard boiled your eggs for 25 minutes you wouldn’t be worried about the whites. Your yolk centers would be so dark grey and smelling/tasting of sulfur, it would render your dish inedible. Just saying…
Not even close!!
Wow! So perfect, after years of mutilated egg whites and embarrassing deviled eggs, what an easy method to perfect peeling and beautiful showing of my deviled eggs. Thank you so much!
HAPPY THANKSGIVING ❤️
Finally, after years of trying other methods, I discovered your fool proof way of getting hard cooked eggs to peel! Thank you!
Unbelievable!!! Just two eggs into peeling and WOW!!!! Thank you sooooo much!!!!
I am looking for the eggs shelling video, “see how I shock them right in the pan with ice water in the tutorial video on this page,” but cannot find it.
Thanks for letting us know! I just refreshed the video, you should see it now mid-page.
Sadly to say didn’t work for me . I followed the directions but left the gas on for about a minute because it didn’t get to a rolling boil .
A bit under done for my taste but , they did peel easier . Maybe a little higher on the simmer may be the key .
I have been cooking hard boiled eggs for 50 years and have recently been buying already cooked and peeled eggs because mine were always a “crap shoot” as to whether or not I could use them for deviled eggs. I made my own hard boiled eggs using your recipe this morning and it is FABULOUS!!! I used a steamer basket to lower the eggs into the boiling water and an egg piercer instead of a thumbtack. TRULY FABULOUS!!! THANK YOU!!!
A question please, while I wait 15 minutes to peel:
When I dropped my still-cool-from-the-fridge eggs in the boiling water it stopped boiling (doh!) So am I supposed to bring them to a rolling boil and wait 30 seconds after rolling boil starts, before covering and simmering? There were some bubbles coming up from the bottom but it was not a rolling boil before I covered them. 🤷🏻
I nailed it thanks to your instructions.
I was craving an egg salad sandwich so took 6 farm fresh eggs and did them my old way,covered them in water ,put on high,give them 6-7 min boiling and then cool in water. Well, i had more like an egg yolk sandwich as it was a disaster peeling so got on internet and found your site. Took 3 eggs from same carton and followed your instructions, including the pin hole. I have 3 beautiful peeled eggs in the fridge. Thanks for the tips. xo
Glad to hear it! 🙂
Best method I have found, golden !
What a wonderful recipe! I am the deviled egg maker in our family & i am gonna crush Easter in 2022! Thank u for this much better, foolproof way of cooking hard boiled eggs! Have a safe & fun 4th !🇺🇸
Came out perfectly.only question if I cover the pot it comes to a rolling boil so I took the cover off.still turned out perfect.
All of my eggs came out runny and not done and Stuck to the shell
Your recipe is great . i have been boiling my eggs to long with no simmer time at all, so it worked out swell. Thank you for your boilling tips.
Question … The ice bath will melt in the first few minutes when the hot eggs are placed, but you’re saying the eggs should be in an ice bath for 15 minutes. Do you add more ice, or just let them be in the melted ice/water bath?
Hi Ann-Marie, no need to add more ice. Yes, it will melt, but as long as the water is cold it will cool the eggs. I usually add a few big cups of handfuls of ice and don’t need to add more. Just let the eggs sit in the cold / melty ice water. ~E
I use old plastic butter tubs and it gets the water and doesn’t melt so fast.. I stir them around off and on while in the cold bath to make sure they all get cold..I love this recipe.. amazingly easy to peel
Thank you. I followed the recipe exactly, I have never had such perfect easy to peel eggs. I have been making deviled eggs for 40 years and this is the first time I haven’t had to waste eggs.
Horrible! Does the exact opposite and makes the shell stick like glue so I’m left with nothing but yoke, unless I spend 30 minutes on each egg.
I’ve been the deviled egg queen for years and knew that older eggs were best but I did try the boiling water this time and ALL 2 dozen eggs peeled without an issue ! I also use about 1/4 cup of baking soda in the water. And an ice shock. Thank you!
I followed this exactly and the efgs were not even cooked. 👎🏼
I have been trying for years to find the perfect method to easily peel eggs, and finally – today was the day I discovered your method! I was so excited that I was EASILY peeling my hard boiled eggs for the first time ever. Thanks so much for sharing!
Perfect eggs🐣
Finally! I was getting used towasting a few eggs due to peeling! Every egg pelted in 3-4 pieces, really fast! Awesome!
This worked perfectly for me.
Thank you
I used your method and successfully cooked six beautiful hard boiled eggs. I bought them at my grocery store so they were fresh but not just lifted from the backyard nest. They peeled great and the yolk is perfectly yellow.
Wonderful recipe. Works like a charm. I’ve NEVER had such an easy time peeling hard boiled eggs. Thank you!
Seriously”Easy to Peel” eggs. I don’t understand any negative review. Followed to the T. Now I have perfect deviled eggs for Easter. Thank you for sharing.
Recipe was terrific. Thanks so much. Just an FYI.
This website does not scale well on mobile devices and half the text is cut off. This seems to happen no matter which phone I am using (android or apple, I have one each for home and work). You might need to advise your web developer. You’re possibly missing hits on your site because readers can’t view it properly. Happy to send screen shots if you need them
Thanks again for the great tips. 😍
Hi there, thanks for letting us know! We want to fix that right away. Just sent you an email if you can please send us a screenshot, we would be so grateful. (Or, send it to our contact form.) Again, thanks!
I never did pin holes bu im making a dozen and i stuck 6 lightly to check it out should know in a few minutes
I had no leakedge from pin holes but cause my eggs were so cold about 4 shells cracked bu its still looking good not much leaking.
13 minutes and counting till the big ice down
I was skeptical of this recipe. So I followed the recipe and it works wonderfully! I am so glad I read this recipe. I’ve always had a hard time peeling the eggs. But not with this recipe period Thank you so much for sharing it!
Worked perfectly. I have my own chooks so none of the eggs are more than a week old and I have never been able to shell them successfully before. I have just done 10 perfectly peeled eggs so we are having devilled eggs with the Christmas salad. Thank you from New Zealand. where we are enjoying a hot summer Christmas.
This was incredibly easy, I have been trying to make deviled eggs and out of 12 eggs I have to throw out 4 to 5 of them. Thank you for the great idea 🥚🙂👍
The boiled egg process was awesome and worked perfectly. THANK YOU. First time ever I didn’t have the white part all torn up.
Do not punch a pinhole in the egg. You get an instant stream of egg white shooting out of the hole as soon as you lower them in the boiling water. The water was full of cooked strings of egg whites and there were large voids in the whites missing from the finished egg. Also, the voids of whites were full of water.
Almost every egg has an air bubble in it. You can find the air bubble by shining a light on the egg and looking fo a shadow. If you gently poke a hole in the center of the shadow it shouldn’t leak the white as long as you don’t go too deep. The membrane that contains the wet part of the egg forms on the other side of bubble.
There are exceptions to every rule, but if you are using store bought eggs they have been run through some fascinatingly high tech equipment that bring the chance of finding an exception to almost zero.
I was wondering about that cause great grandma, grandma, all my aunties,, mommy never poked no holes in the egg. Plus if one cracks when you drop it in we all know theirs egg white bubbling all in the water.. Ive never poked a hole in egg for boiling and after all my family im 63 i stil dont poke a hole.
My eggs are perfect most of the time.
I may have to refer to this if I don’t plan ahead. . .
I’ve always just aged the eggs for a week in the fridge, then set them out to reach room temperature. I lower them into a 6 qt pot of cool tap water, and put them on the stove on med-high. When the water rolls, I set a timer for 8 minutes. Once time has elapsed, I cool the eggs immediately under cold running water, dry, then finish chilling in the fridge.
Hi Elizabeth,
I love hard boiled eggs, and deviled eggs. I hate peeling them – I used to say! I made this today for the first time and the eggs were perfect and peeled like a dream!!! Thank you!!!!
Hi Elizabeth. I am a 77 years young man and have been trying for all those years to boil an egg that would not have the greenish/grey look around the yolk and MOST importantly how to peel the shell off the egg without demolishing the egg. I want to give you my greatest appreciation for sharing your method to accomplish these goals. I have tried other folks methods and none seem to work for me, but your method worked the first time I tried it. I am super happy with the results I got. I just wish I could have found you sooner than 77 years. Thank you so much. Dale
I have tried so many recipes for perfect eggs, that I’ve lose count, so I didn’t have high hopes for the recipe. Oh my goodness! All twelve eggs came out PERFECTLY! I’ve never been this excited about making deviled eggs before. Using this recipe forever from now on! Thank you!
So happy to hear this, Michelle! Thanks for being in our online community. ~Elizabeth
This works! I’m 60 years old and have never boiled an easy to peel egg. I have avoided recipes with boiled eggs. I did have to make potato salad for my daughter for Labor Day so I sucked it up, Googled for “Easy to peel eggs”, found this method and followed it exactly; with the pin hole on top of the egg. I got so excited when the shell came off beautifully. Thank you ,thank you, thank you!
This method really works! So glad I went on line to solve the problem of peeling hardboiled eggs. Boiled 12 eggs for egg salad and EVERY SINGLE egg peeled beautifully!
Joyce, so glad to hear it! Thanks for stopping by to comment. ~E
Hello,
My former girl showed me her method that worked great, I have forgotten it.
I used your plan, well close, they peeled better than any eggs I have ever made. Thank you.
Glad to hear it! ~E
Your video says keep in ice bath for 30 minutes but your directions say 15. Which is it?
Hi Kati, thanks for pointing that out! 15-30 minutes would both work. We’ll update that.
It worked! The eggs peeled beautifully and easily—thank you!
This method works PERFECTLY. I honestly don’t understand some of the negative comments from other reviewers. I used a large mesh spoon (like the kind used in Asian cooking) to GENTLY lower my eggs (3 at a time) into the boiling water. Eggs are very fragile, so if you’re not careful, you WILL crack them. After I got all my eggs into the water, I set my phone’s timer to 13 minutes. When done, I fished the eggs out of the pot with the same large mesh spoon and placed them in a large bowl filled with ice and water. I let them sit there for at least 15 minutes and then was able to gently tap them on the counter and peel them easily. I can’t wait to make deviled eggs now that I’ve finally figured out how to make perfectly flawless hardboiled eggs.
Did not work for me the minute I put the eggs in the boiling water 2 cracked have not gotten to the remove the shell yet… Jeanie Morgan
This was fabulous! You are my new hero!!
So easy and it works every time 😀
Printable recipe has different timing for boiling and for the water bath than shown in video.
While this method works perfectly, I would like to note that I read these exact instructions on The Pioneer Woman’s website in 2015. Complete with the comment regarding the cold start method for potatoes. Only difference is she says to leave the eggs in the ice water bath for 5 minutes instead of 15. I came across your post by happenstance while looking at varying recipes for egg salad. I’m not sure who posted first as I could find no date on yours. And it does work.
Hi Amanda, thanks for the note. I love Ree! She is amazing. I learned this method from my mom when I was a kid and didn’t know that Ree also has it on her site. Food preparations aren’t copyrighted (But images and the words we use (the copy) are copyrighted). Methods are not so no big deal that it’s on more than one site, similar to there being hundreds—if not thousands—of blog posts about how to make sourdough bread. Again, all images and the words in which we type are copyrighted – but general methods are not. Thanks for stopping by to comment!
This is the one. Finally a truly ez peel recipe that works. Thank you.
Thank you, thank you, thank you. This is the only recipe for easy peeling eggs I have found. Perfect peeling eggs every time. My mother made perfect peeling eggs but when I tried it her way, it never worked for me. I love boiled eggs but hate when I end up with what I call a slaughters egg. With this recipe, the shells just fell off the egg, I didn’t even prick the egg with a pin. Thank you very much.
This is the best recipe The eggs turned out perfect they didn’t crack if you use the slotted spoon and gently put them in I didn’t cover them when they simmered but put them when I put them in the ice cold water I made sure to use the strainer to gently put them in they turned out so good.. I’m turning 67 and I am a baker and never sure how the eggs are going to turn out now I don’t have to worry
Ok, I had to turn on my common sense and then this worked great. I took my boiling water off the burner and let it settle a moment and then gently lowered my eggs. Worked great!
I had several broken eggs on my first batch when I put the eggs in while he water was at a rolling boil. Hope this helps someone because this recipe is a game changer!!!!
Ok, I boiled the water, slowly and gently added the eggs one at a time with a slotted plastic spoon, and as soon as the eggs touched the boiling hot water they cracked open. What am I doing wrong here. My eggs are 1 day from expiration so they are definitely old.
I have never had eggs that peel so easily! I will never cook them any other way!
Oh my goodness. This worked great. Thank you Elizabeth. You Rock
This is the BEST “recipe” for perfectly easy to peel eggs. I was getting so frustrated boiling eggs and when peeling them the half of the whites would come off with the shells.
However, this has changed my life…well my egg boiling life! 🙂 My daughter will only eat boiled eggs so this was definitely a lifesaver, thank you!!
I was really hoping this method would work because peeling eggs is no fun! I followed the instructions to a T and to my dismay they peeled in 1 billion little pieces and the yolk in the egg was yellow and rubbery I ended up throwing the eggs away what a shame this didn’t work.
You are Brilliant Elizabeth Rider! I love hard boiled eggs, but I could never find a good method for an easy peel, so I just pretty much stopped… I deployed ur method just yesterday and the results were stunning! Not only did the shells just “slide” away – the eggs were gorgeous… If they do t end up on the cover of Bon Appetite; I’ll cancel my subscription… Thank you
I boiled 10 eggs using Elizabeth’s method. I planned to peel 2, and put the rest in the fridge until I was ready to use them. They were so easy to peel that I peeled all 10, in about the same amount of time it’s taken me to peel only 2 in the past. And the eggs came out looking smooth and perfect. This worked perfect!
Thanks for the tips for the hard boiled eggs. I cooked my first batch using a different recipe and the peeling was a disaster. Cooked another dozen using your “tricks” including the pin hole in the end and peeling was a breeze. My wife will be happy when she prepares deviled eggs for our super bowl dinner tomorrow
Elizabeth,
Your recipe is perfect! I used a pin to prick the eggs, and I wondered if eggs would crack when placed in boiling water and they did not. After 15 minute ice bath they peeled so easily.
Thank you so much for this post!!!
Ana
In one place above it says you can keep an unpeeled hard boiled egg in the refrigerator for three days and in another place unpeeled in the refrigerator for seven days.
Followed yourcdurections to a tee! Easy peel and a more creamy yoke, but not undercooked!
Easiest peel I have ever had!! Didnt lose my temper this time!!🤣😂
All 6 eggs cracked even though they were gently lowered into the hot water. 😩. This might work if the eggs were brought to room temp before placing into the water. Shame on me….everyone knows cold to extreme hot will make glass break…..no difference in a thin egg shell!
Worked perfectly!!! Have been trying to do this for decades. Thank you SO much! How did you figure it out??
I tried multiple “tricks” to cook hard boiled eggs in the past, but I ran into problems with peeling the shell. I followed the directions that Elizabeth provided on this page, and I was amazed at how quickly I was able to peel the shells without damaging the smoothness of the egg once peeled.
Did not work and it was impossible to peel my eggs. They were week old eggs and I followed your instructions perfectly. I gave up and threw the eggs away. I am going back to salt and vinegar which works better than this terrible method.
PERFECT!!! Thanks!!!
Tried it exactly as instructed… it didn’t work. I don’t know if it was the non-stick pan I was using, which is all I have. Or if it’s the fact that the lowest setting on my stove is literally low or .5 when it goes all the way up to a 9.5.
Either way my eggs turned out like one minute boiled eggs. ☹️
Sorry, but I wasted a dozen eggs on your method!! They were not done and runny and couldn’t even use them. I just go back to my boil with vintager and then out under cold water. Turned out much better then this did!!
I tried the cracking egg at one end and then the other end and the shells practically fell right off it’s the first time in my life I have ever had an egg pell like that and I’ve tried everything thank you so much!
I followed this recipe to the letter and wasted 18 eggs. They all turned out half cookedand the shells stuck worse than I’ve ever had. Would not recommend this technique.
Wow. Tried this and all of the eggs came out less than soft boiled. I’m an experienced cook, have made hundreds of deviled eggs, but I just ruined 18 eggs.
After years of trying numerous tricks to peel my eggs, I have finally found the only one that works like a charm every time!!!!
I just did hard boiled eggs according to your instructions and was so exited that they peeled just as easily as you said.. I have always had trouble peeling newer eggs. This is amazing and I thank you so much for your. Have a blessed thanksgiving. You just made my day.
To the people saying their eggs are cracking as soon as you put into the boiling water. Eggs should always sit on the counter and let come to room temp before cooking. Even if you don’t leave them out that long, as least put them out for a few minutes so they can slightly warm up. I usually set out the ones I’m going to cook before I do anything else…preheating oven or getting other ingredients. Usually by the time I’m ready to cook them, the egg shells have quite a bit of condensation on the outside so I know they have warmed up from the fridge. The extreme temperature difference is what makes them crack.
Good luck.
THANK YOU Elizabeth!!! For years I’ve been struggling with peeling hard boiled eggs. I followed your instructions exactly, and it was like magic !!! I cooked 8 eggs and as I was peeling them, I kept waiting for the shells to stick and the eggs to destruct, but it never happened. Thank you again!
Why does my eggs crack as soon as I place them in the boiling water
Good news and bad news. The good news is that the eggs peeled like a dream. The bad news is that they were not hardboiled after 13 minutes. I had to keep them in the heat for at least another 5 minutes. Maybe my simmer was too weak? But it was a real treat to have smooth eggs after peeling! Beautiful!
For 60+ years (ok for 40+ years as an adult), I have been battling peeling hard boiled eggs, only to be disappointed with ugly, torn eggs. The method is so simple, and my eggs come out perfect every time. THANK YOU!!! THANK YOU!!
Haven’t tried it, but just a quick question. Is that boil 30 seconds after the pot come back up to a full rolling boil, or start timing the 30 seconds the instant the last egg is in?
Hi Bob, either will work, but I start the 30 seconds right after I lower them into the pan. ~E
I love hard boiled eggs!! Sliced on salads and sandwich’s, mashed-up to make egg salad and eaten whole w/ salt as a snack. But, I have never had any kind of consistent luck in getting them properly cooked or in peeling them.
UNTIL NOW!!! I followed your instructions precisely (very easy due to my German heritage)
and they turned out PERFECTLY!!! Many thanks
Hi Mike, thanks for sharing! Glad to hear it worked perfectly for you. ~E
This method does a very poor job. The eggs Crack as a result of being lowered into boiling water. The water had egg white streams floating in it and some of the eggs were cracked open to the point of being unuesable.
I am impressed! Worked great w/Trader Joe’s eggs. One cracked and some white came out but I just scraped it off after the ice bath and it was still perfectly usable. Thank you!
Just as a side note…when I put the eggs into the ice bath I like to crack the eggshells after a couple of minutes. It seems to allow water in between membrane and egg as they cool adding to the ease of peeling.
This method of boiling eggs worked perfectly!
Eggs turned out soft and beautiful, with no gray ring around the yolk. I might actually enjoy eating boiled eggs again!
Thank you for the tips, (including poking the end of the eggs with a tack, which I had never tried before.)
5 out of 12 eggs cracked as soon as they hit the water. But I only had 1 day old eggs and they peeled easily.
All the eggs cracked and leaked as soon as they hit the water. What a mess
Hi Joe, this is interesting. We have so many comments here on how well this works, so sorry to hear that! It’s important to use a slotted spoon or mesh basket to very gently lower the eggs into the water. Also, be sure not to crowd the pan—the eggs should have a little room (for example, 4 eggs in an 8-inch diameter pot). Hope that helps!
I admit. I was very skeptical because I’ve tried other methods that didn’t work (adding Vinegar to the water). I figured it wouldn’t hurt to try your method. It worked perfectly the first time and I thought maybe it was a lucky try. I tried it again and now this will be my only method for boiling eggs. I’m still wondering how I never saw your method before!! Thank you!!!
I’ve always done this exact method myself, but my housekeeper insists on doing it her way and the shell sticks to the egg and breaks up into a mosaic so then she insists the eggs are old. LOL Now I can print out your instructions so I can be a happy camper.
Worked great…wow I’m thrilled….Thanks a million!!
The eggs all cracked when placed ever so gently into the boiling water. Ugly eggs, sloppy peel. Doesn’t work.
Looking for the answer to this boiling question. Do I wait until the water starts boiling again to start my 30 second count or do I start when I lower eggs in even though the water has temporarily cease to boil?
Hi Velma! Start your 30 seconds from when you lower the eggs into the water. If you’re off by a few seconds it doesn’t matter, but you don’t need to wait for the water to come back up to a boil. Thanks! ~E
Oh my goodness, I used eggs that are farm fresh, probably only 2 weeks old. Followed this method, poked the big end of each egg as directed. Eggs peeled perfectly and easily! Yes, it works!!
Nice egg tip. When I lower 12 eggs into boiling water, even if the eggs are near room temp, the water stops boiling for 60 to 90 secs. Are we to wait for the water to start boiling and then count 30 secs? Thank you
Thank you for this post! My eggs peeled perfectly!
I’m so happy. It worked perfectly. So easy too. Thank you so much!!!!
I’ve tried several ez peel egg recipes. Yours is the brst
I can’t believe it! This totally worked. I’m looking at 6 beautifully peeled hard boiled eggs. Thanks for the tip. I’ve tried others but this is the first to work for me.
Tried this on a couple of eggs – test run for doing 4-5 dozen eggs for an event. Worked WONDERFULLY! Only question – ‘boil for 30 seconds.’ When the eggs are immersed, the water stops boiling, when do you start the 30-second clock – when it returns to boiling or simply after the egg are immersed? Thank you.
What am I doing wrong? I followed these directions exactly, even poking the hole with the thumbtack, and the eggs were impossible to peel. I actually gave up and tossed them. 😔
Thank you for this great idea! I’ve tried to do it and it really works!
Have you used an electric stovetop to employ this method? I always worry about the boiling water taking too long to reverse to a simmer, thereby overcooking the eggs in the process.
WORKS PERFECTLY!! I followed these instructions precisely and they peeled absolutely perfectly! Thanks so much!
The reason you start eggs in cold water is that they often crack if you put the cold eggs into hot water, same as if you pour hot water into a cold glass. I’ve never heard anything about starting cold making eggs cook better or taste better, it’s just to keep them intact.
Works perfectly! It’s awesome to finally get it right.
This recipe and Google Maps — reasons alone for the internet. I can’t believe I’ve spent my entire adult life trying to peel hard-boiled eggs so unsuccessfully. This worked perfectly! Thank you, now and for the rest of my years..