


This homemade almond milk recipe takes just 2 ingredients, about 5 minutes of active time, and tastes so much better than store-bought. I’ve been making almond milk at home a few times per month for over 15 years and can say it’s definitely worth it.
Just like my famous almond flour bread recipe, homemade almond milk not only tastes better than anything store-bought, but it’s healthier, too.
To make almond milk at home, you’ll need:
- almonds (unroasted, unsalted)
- water (preferably filtered)
- salt (optional, adds to flavor)
- optional additions: sweetener (e.g. dates, sugar, honey) or spices (e.g. vanilla, cinnamon)
I prefer to make almond milk plain because it keeps longer in the fridge. Add any flavors or sweeteners as you use it.
Most store-bought nut milks contain gums, carrageenan, and preservatives. Homemade, on the other hand, is fresh, creamy, and free from additives. You’ll enjoy a healthier, cost-effective, and delicious dairy-free alternative at home.
Almond Milk Ingredients
- Raw Almonds: Soak 1 cup (about 140g) of raw almonds overnight in a bowl of water. The longer you soak them, the creamier your milk will be. Skipping this step will result in watery almond milk.
- Water: You’ll need water to soak the almonds, plus 3 cups of filtered water to blend.
- A pinch of sea salt: Enhances flavor and adds trace minerals. The salt is optional but I recommend it for the balance of flavor.
Optional Add-Ins
Pro tip: I’ve found that adding sweeteners like dates or honey can shorten the shelf life. I’ve found it lasts about 4 days when sweetened, compared to 6–7 days when made plain.
- Sweetener: Pitted Medjool dates, maple syrup, or honey.
- Vanilla extract: For extra flavor.
- Other: A dash of cinnamon or 2–3 Brazil nuts (soak additional nuts with the almonds) for added nutrients.
Step-by-Step: How to Make Almond Milk
Step 1: Soak the Almonds
Cover 1 cup (about 140 grams)of raw almonds with water (about 1 inch above) and soak for 8–12 hours. If using sweeteners like dates, soak them with the almonds. After soaking, drain and rinse well.
Step 2: Blend
Add soaked almonds, 3 cups filtered water, a big pinch of sea salt, and any optional add-ins to a high-speed blender. Blend for 60–90 seconds, or until the mixture is completely smooth. (You may need to blend longer depending on your blender.)

Step 3: Strain
Pour the mixture through a nut milk bag or cheesecloth over a bowl. Squeeze to extract all the liquid. You’ll be left with almond pulp, which you can save to make almond meal.

Step 4: Store
Transfer your fresh almond milk to a mason jar or sealed container. Keep refrigerated and enjoy within 5–6 days.
Why Make Almond Milk?
Almond milk is a creamy, lactose-free alternative to cow’s milk, great for coffee, cereal, smoothies, and more. It’s easier on digestion and packed with vitamin E, protein, and fiber. Plus, when you make it at home, you avoid carrageenan, gums, and unnecessary additives found in many store-bought brands.
How to Use Almond Milk
Use it just like regular milk:
- In coffee or matcha
- Over oatmeal, overnight oats, or cereal
- In smoothies (like my Strawberry Banana Smoothie or Blueberry Smoothie)
- For healthy hot chocolate
- Or try my Banana Almond Milk Ice Cream
Recipe Variations
You can use this method to make:
- Cashew cream and cashew milk (no straining needed)
- Macadamia, walnut, or hazelnut milk
- A blend of your favorite nuts
- Add a Brazil nut or two to soak with your almonds when you make almond milk to up your selenium intake.
Nut-based milks are often easier to digest than dairy and offer a variety of flavors and nutrients.
Making almond milk at home is simple, customizable, and better for your body. Once you try it, you’ll never go back to the boxed stuff.

How to Store:
Homemade almond milk will keep in a jar with the lid on for up to 5-6 days in the fridge if it’s unsweetened. Sweetened almond milk will last 3-4 days in the refrigerator.
Print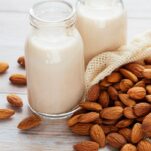
Homemade Almond Milk
- Prep Time: 10 minutes
- Total Time: 8-12 hours (includes soaking time)
- Yield: 3 Cups (700ml)
- Category: Drink
- Method: Blend, Strain
- Cuisine: American
Description
Making your own almond milk at home is quick, easy, and requires just a few simple ingredients. All you need are raw almonds, filtered water, and a pinch of sea salt for a creamy, clean-tasting plant-based milk—no gums, preservatives, or additives. Customize it with Medjool dates, vanilla, or Brazil nuts for added flavor and nutrients.
Ingredients
- 1 cup raw almonds (about 140g), soaked overnight
- 3 cups water (preferably filtered)
- 1 pinch of sea salt (about 1/8 teaspoon)
Optional Add-Ins
- 1–2 Medjool dates (soaked with the almonds; see my note about add-ins below)
- 1 teaspoon vanilla extract
- 3–4 Brazil nuts (soaked with the almonds, optional)
Instructions
- Soak the Almonds: Place almonds in a medium bowl and cover with water (about 1 inch above the almonds). Soak for 8–12 hours at room temperature or up to 24 hours in the refrigerator. If using dates, soak them with the almonds.
- Drain & Rinse: After soaking, drain and rinse the almonds thoroughly until the water runs clear.
- Blend: Add the soaked almonds, 3 cups of filtered water, sea salt, and any optional ingredients to a high-speed blender. Blend for 60–90 seconds until smooth and fully emulsified.
- Strain: Line a mixing bowl (preferably with a pour spout) with a nut milk bag or double-layered cheesecloth. Pour the blended mixture through the bag and squeeze out all the liquid. Tie or hold the top of the bag to prevent spills.
- Store: Transfer the strained almond milk to a clean jar or airtight container. Refrigerate for up to 5 days. Shake well before using, as natural separation is normal.
Notes
While sweeteners and flavorings like dates, vanilla, or cinnamon make almond milk extra delicious, keep in mind that adding them can reduce how long your milk stays fresh. When kept plain—just almonds, water, and a pinch of salt—your almond milk will typically last 5–6 days in the fridge. If you add sweeteners, plan to use it within 3–4 days. A great tip is to make your almond milk plain, then add sweetener or flavorings right before serving.
Almond Milk FAQs
How long does homemade almond milk last?
Up to 5–6 days in the fridge. Store in a glass jar or bottle with a tight-fitting lid.
Can I make almond milk without soaking the almonds?
Technically, yes, but it will be much thinner and less creamy. Almonds are expensive, so to get the most bang for your buck, I recommend soaking them for best results.
Does almond milk contain carrageenan?
Homemade almond milk does not contain carrageenan or other emulsifiers. If your milk separates, just give it a shake!
Can I flavor my almond milk?
Yes! Add dates, vanilla, cinnamon, or even cacao for a chocolate version. However, I like to remind people that when you add anything to almond milk, especially a sweetener, it doesn’t keep as long. When I add dates or honey to sweeten, I notice it starts to go bad after about 4 days. It keeps for 6-7 days when made plain, so I make it plain then add sweetener as needed.
How to Use the Almond Pulp
Don’t throw it away! Dry the leftover pulp in a 200°F oven for an hour to make almond meal. You can also dehydrate it if you prefer.
Can You Make Almond Milk from Almond Butter?
Yes—and it’s surprisingly quick! While I prefer the flavor and texture of almond milk made from whole soaked almonds (I think it’s much better!), the almond butter method is great when you’re in a rush and can work in a pinch.
How to Make Almond Milk from Almond Butter:
- Combine 1.5 tablespoons of plain almond butter with 1 cup filtered water in a blender.
- (Optional) Add natural flavorings, such as dates, a touch of maple syrup or honey, vanilla extract, and a pinch of salt.
- Blend on high for 30–45 seconds until smooth and creamy.
- Serve immediately, with or without the pulp. Some people don’t mind the texture of the pulp. If you want a smooth almond milk, you’ll still want to filter it through a nut milk bag, cheese cloth, or fine mesh strainer to remove the pulp. This method takes just 2-5 minutes total.
Benefits:
- Takes under 5 minutes—ideal for when you forget to soak almonds.
- Easy cleanup and less time.
- Great for small batches (1–2 cups at a time).
Downsides Compared to Whole Almond Method:
- Slightly more oily or “roasty” flavor, especially if your almond butter is made from roasted nuts.
- Texture can be a little watery or less complex than almond milk made from soaked whole almonds.
While the almond butter method can be a lifesaver when you’re short on time, the best taste and freshness still come from making almond milk the traditional way—from soaked whole almonds. Personally, for quality and flavor, I always go back to the full method—but I keep the butter method in my back pocket for days I’m in a hurry.
More Almond Recipes:
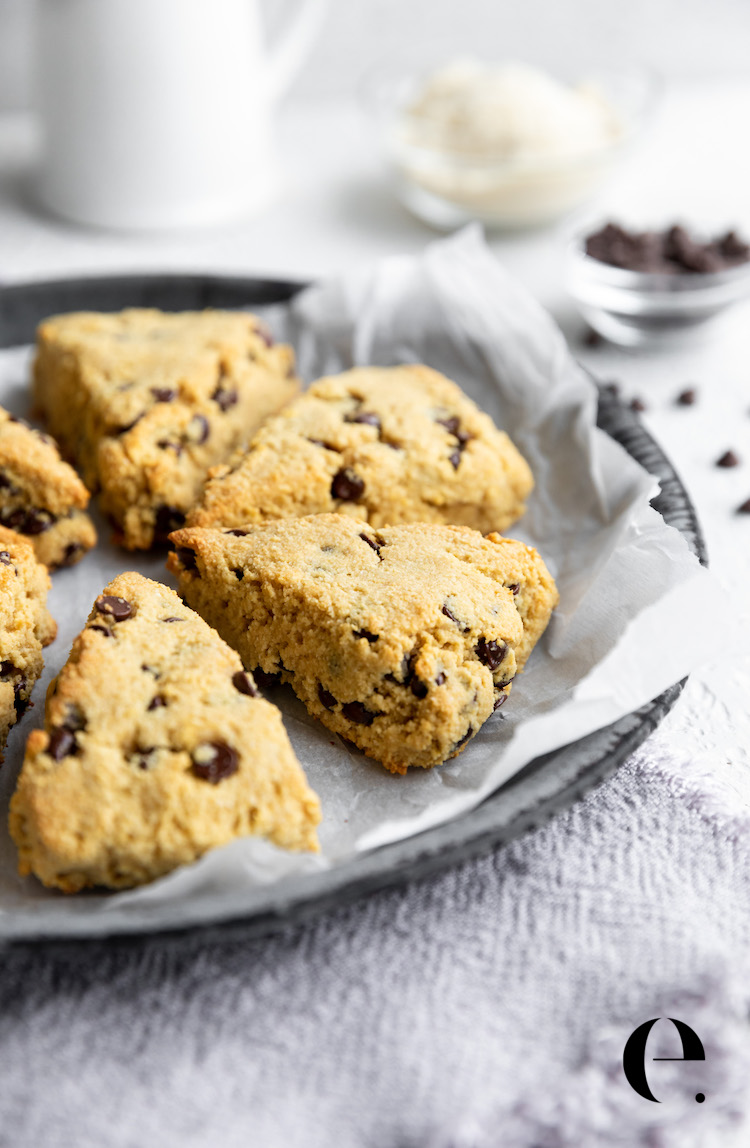
Incredible Almond Flour Scones Recipe (GF)
Almond flour scones are healthy, incredibly delicious, and super easy to make! With just 7 ingredients, you can whip up a batch quickly and easily.

Perfect Almond Flour Cookies
Make this delicious Almond Flour Cookies recipe. With just 5 ingredients, they’re gluten-free, easy, and perfect for a healthy treat. This recipe makes 12 (2-inch) round cookies.

The Perfect Almond Flour Bread Recipe
This almond flour bread recipe is a top Google Search and Youtube Search result for a reason! Combining almond flour with a few simple ingredients turns into a wonderful gluten-free almond flour bread. Make this almond flour bread recipe exactly as written for the best results.

Almond Flour Banana Bread Recipe (GF)
This almond flour banana bread recipe is healthy, delicious, and easy to make. It’s lower in carbs than traditional banana bread but doesn’t sacrifice any flavor. Enjoy!
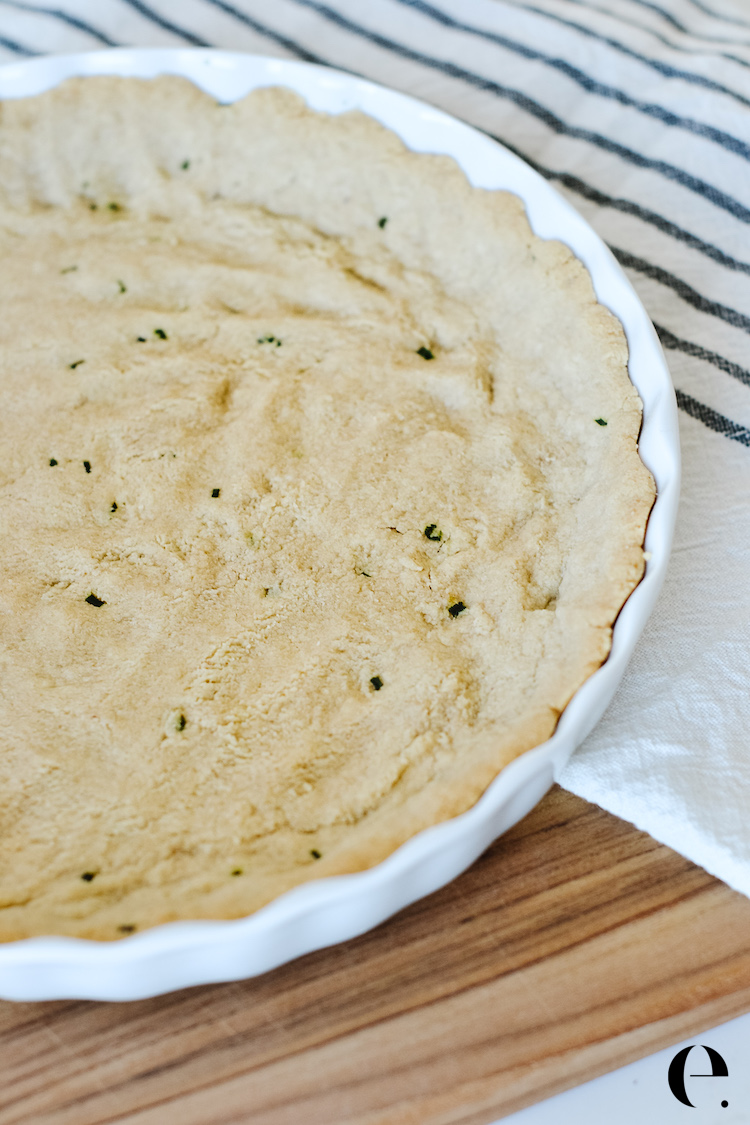
Almond Flour Quiche Crust (Gluten-Free)
If you’re looking for a healthy quiche crust recipe, use my almond flour quiche crust (gluten-free) with any quiche filling recipe for a wonderfully delicious—and much healthier—treat. You can turn any frittata into a healthy version of a traditional quiche by baking it inside this crust. Traditional quiche crust is made with highly processed white
")


")
This homemade almond milk recipe is a healthy and delicious dairy free alternative.