


If you’re looking for a healthy quiche crust recipe, use my almond flour quiche crust (gluten-free) with any quiche filling recipe for a wonderfully delicious—and much healthier—treat.
You can turn any frittata into a healthy version of a traditional quiche by baking it inside this crust.
Traditional quiche crust is made with highly processed white flour that has no nutritional benefits. Replacing it with this almond flour-based crust keeps it low-glycemic and adds nutrients, a little healthy fat, and fiber to your dish.
How to Make Almond Flour Quiche Crust
This recipe makes one 8 or 10-inch quiche crust. It’s best if left in the pan you bake it in. You can make it up to one day ahead of time, then cover and store it in the refrigerator until it’s time to use.
- Quiche crust needs to be baked before you pour the raw egg frittata mixture inside. Simply mix the ingredients then use your hands to press the mixture into a pie pan.
- Bake the crust and let it cool for at least an hour.
- Once it’s cooled, add your quiche filling and bake again until set. Need an idea? Use the Flexible Veggie Frittata recipe from The Health Habit, or my Easy Spinach Frittata would be great, too.
What size pie pan should you use?
You can use an 8-inch or 10-inch pie pan to make this crust. It’s on the thicker side with an 8-inch pan, which is really nice sometimes. Use what you have—both turn out great.
If you want to scale this up for a 12-inch pie pan, add another 1/3 cup of almond flour, one more teaspoon of extra virgin olive oil, and another big pinch of sea salt.
What’s the best filling for an almond flour quiche crust?
Here’s a general quiche filling recipe for a 9-10 inch quiche: Whisk 8 large eggs with 1/3 cup of unsweetened almond milk (or regular milk if you prefer), 3/4 teaspoon sea salt, and a few spins of freshly ground black pepper. Use 10 eggs if you’re making a 12-inch quiche. Stir in 2 cups of cooked and cooled veggies, such as onions, leeks, broccoli, or spinach. If desired, add 1/3 cup shredded or crumbled cheese. Pour into the cooked and cooled quiche filling. Bake at 350°F for 25-35 minutes, or until the center of the quiche is completely set. Serve hot, warm, or at room temperature.
Enjoy!
Print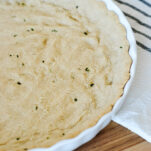
Almond Flour Quiche Crust (GF & DF)
- Prep Time: 5 minutes
- Cook Time: 15 minutes
- Total Time: 30 minutes
- Yield: Makes one 8-inch or 10-inch Quiche Crust
- Category: Breakfast
- Method: Mix, Bake
- Cuisine: American
- Diet: Gluten Free
Ingredients
- 2 cups almond flour
- 1/2 teaspoon sea salt
- 1/2 teaspoon baking soda
- 1/4 cup extra-virgin olive oil
- 2 tablespoons filtered water
- 1 tablespoon freshly chopped chives, optional, use them if you have them
Instructions
- Preheat the oven to 350°F.
- Gently mix the almond flour, sea salt, and baking soda in a large mixing bowl until combined, being careful not to overpack the flour. Gently make a well in the middle of the bowl, then add the olive oil and water. Mix the ingredients with a large wooden spoon or spoon-shaped spatula until a well-combined dough forms. Mix in the chives if using.
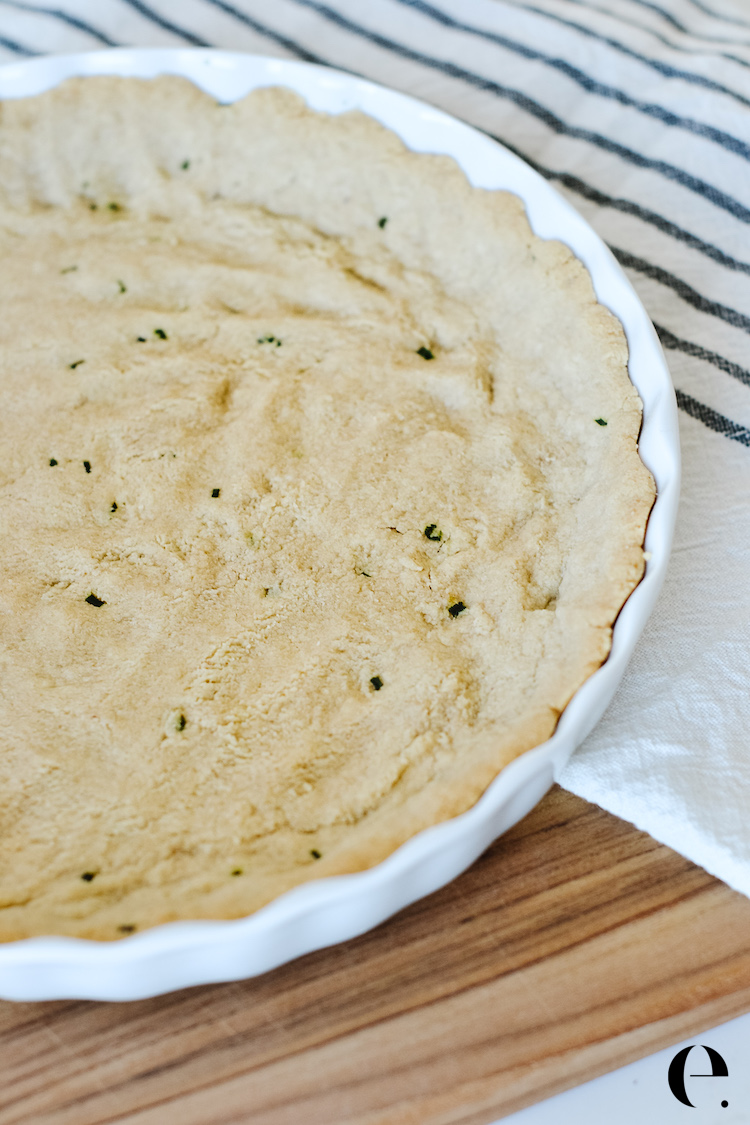
- Transfer the mixture to a 10-inch pie pan. Using your fingers, press and shape the dough mixture about 1/8 inch thick around the pie pan and up the edges to form the crust. Bake for 12 to 15 minutes, until cooked through and set.
- Let the crust cool before adding the egg filling.
- Add any quiche filling you prefer. Bake until the eggs are set and a toothpick comes out the middle clean. In general, most fillings will bake for 20 to 30 minutes in a pre-cooked quiche crust.
To store, let the entire dish come to room temperature and store, covered, in the fridge for up to 3 days. This makes a great make-ahead meal for weekday breakfasts or lunches, too.
Notes
- This recipe is specifically written for almond flour. Other flours cannot be substituted.
- You can use an 8-inch or 10-inch pie pan to make this crust. It’s on the thicker side with an 8-inch pan, which is really nice sometimes. Use what you have—both turn out great. If you want to scale this up for a 12-inch pie pan, add another 1/3 cup of almond flour, one more teaspoon extra virgin olive oil and another big pinch of sea salt.
")


")
This almond flour quiche crust is perfectly flaky and delicious.
Confused. If you are putting a recipe online, would appreciate clarity. What the heck does “cooked and cooked” mean in the Filling paragraph? Also, you show chives in the ingredient lineup of the crust–yet as far as I can tell, no instructions of when to add such a different ingredient to a crust–or if chives actually even belongs in this recipe. Please clarify
Hi Molly, that was a typo, we corrected it to say “cooked and cooled” – you just don’t want to add anything hot to raw eggs as they might start to scramble in the bowl. When I add veggies, I saute them and then let them cook for about 5 minutes before adding them to the egg mixture. The chives are optional, if you use them in the crust add them at any point as you’re mixing the dough. We updated that, too.