


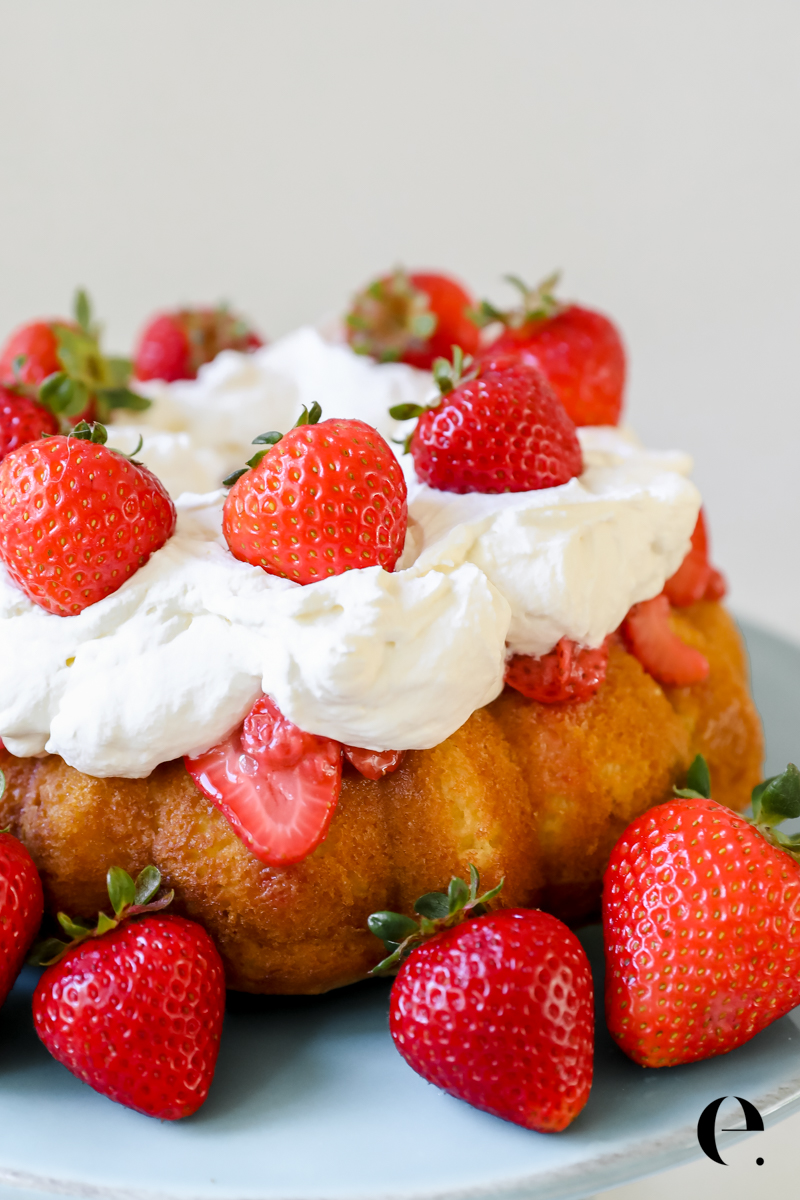
This is hands down the easiest 4th of July dessert I make every single year, and it always gets the most compliments at the party.
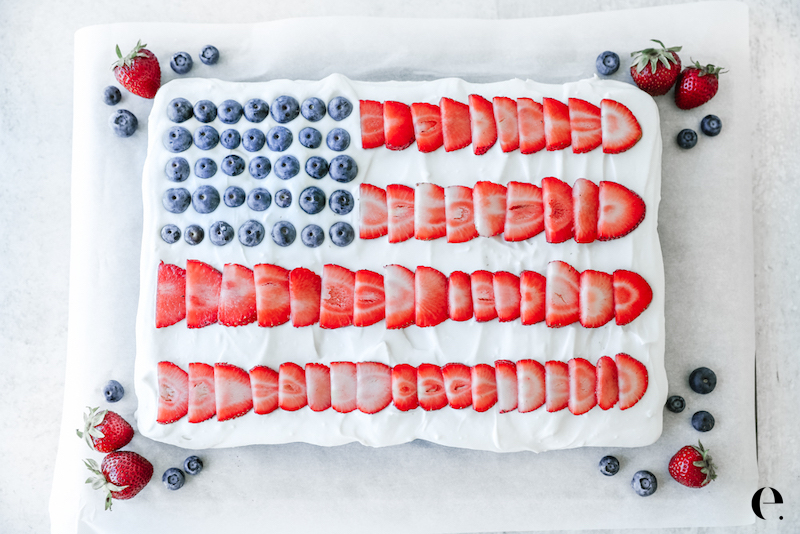
The easiest 4th of July dessert is a flag cake: spread chilled whipped cream over a cooled cake, then make a square of blueberries in the top-left corner and rows of sliced strawberries for the stripes. It comes together with a simple cake, chilled whipped cream, and fresh berries, so there is no fussy frosting, though you can, of course, use vanilla frosting if you prefer. You can use a box mix or a store-bought cake, and the whole thing takes about 15 minutes to decorate.
If you have ever scrolled through complicated 4th of July desserts that take hours and special equipment, this is the opposite of that. It is beautiful, it is a little bit healthier than store-bought, and the kids genuinely love to help.
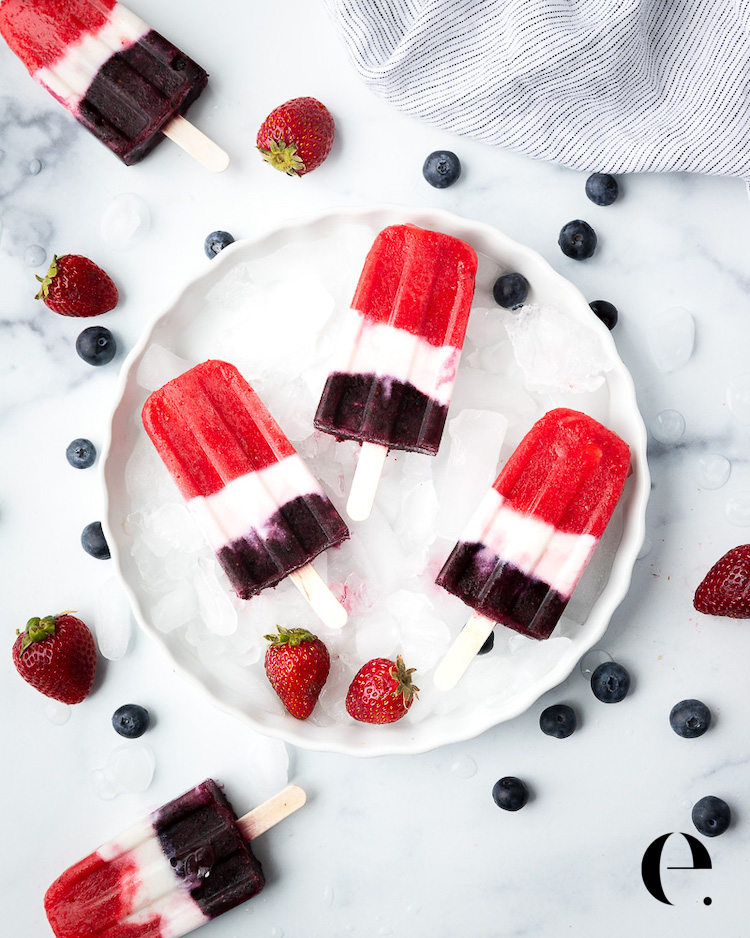
Looking for more 4th of July dessert ideas? I always keep a few easy ones in my back pocket, like my red, white, and blue popsicles, these refreshing watermelon pops, and a classic strawberry shortcake (toss in a handful of blueberries to make it red, white, and blue). But when I want one showstopper that feeds a crowd and barely takes any effort, this flag cake is the one I make.
Why You’ll Love This 4th of July Flag Cake
- No baking skills required. A box mix or even a plain store-bought sheet cake works perfectly, because the magic is all in the berries and cream.
- The coconut whipped cream is naturally dairy-free and lighter than store frosting, and it holds up in summer heat far better than buttercream. You can also use regular whipped cream found here.
- It is the one dessert kids actually want to help make. Arranging the berries is the whole project and they are great at it.
- You can make it fit almost any diet. Gluten-free, dairy-free, egg-free, just swap the cake to match.
- It is chilled and refreshing, which is exactly what you want when it is 90 degrees out and you have already got a hot grill going.
What You Need for a 4th of July Flag Cake
Here is everything, and most of it you can grab in one trip:
- A cake (box mix, store-bought, or from scratch, your call)
- Coconut whipped cream (or any whipped cream you love)
- Fresh blueberries
- Fresh strawberries
That is it. Four components and you have the prettiest dessert on the table.
Flag Cake Ingredient Notes
The Cake
Do not overthink this one. I love a simple yellow cake, but chocolate cake, angel food cake, or even a 9×13 pan of brownies all work beautifully under the cream and berries. Use a box mix, grab an undecorated cake from the bakery, or bake one from scratch if you are in the mood. Whatever you choose, it needs to be completely cooled before you decorate, so I always make or buy it the day before.
Thrive Market has great healthier cake mix options for just about any preference, including gluten-free and grain-free. To save on groceries, I buy my pantry staples and cleaner baking mixes on Thrive Market, a high-quality online grocer. Get 40% off your first order at Thrive Market here.
Coconut Whipped Cream
This is my favorite part. Coconut whipped cream is naturally dairy-free, egg-free, and gluten-free, and the texture is honestly incredible. It has a very faint coconut flavor that pairs perfectly with the berries. You can absolutely use regular whipped cream if you prefer, just make sure both your cake and your cream are well chilled when you assemble.
Fresh Berries (not frozen)
Use fresh blueberries and strawberries here, not frozen. Frozen berries release juice as they thaw and will bleed pink and blue rivers all over your white cream. I buy one pint of each, and you will usually have a little left over for breakfast the next morning.
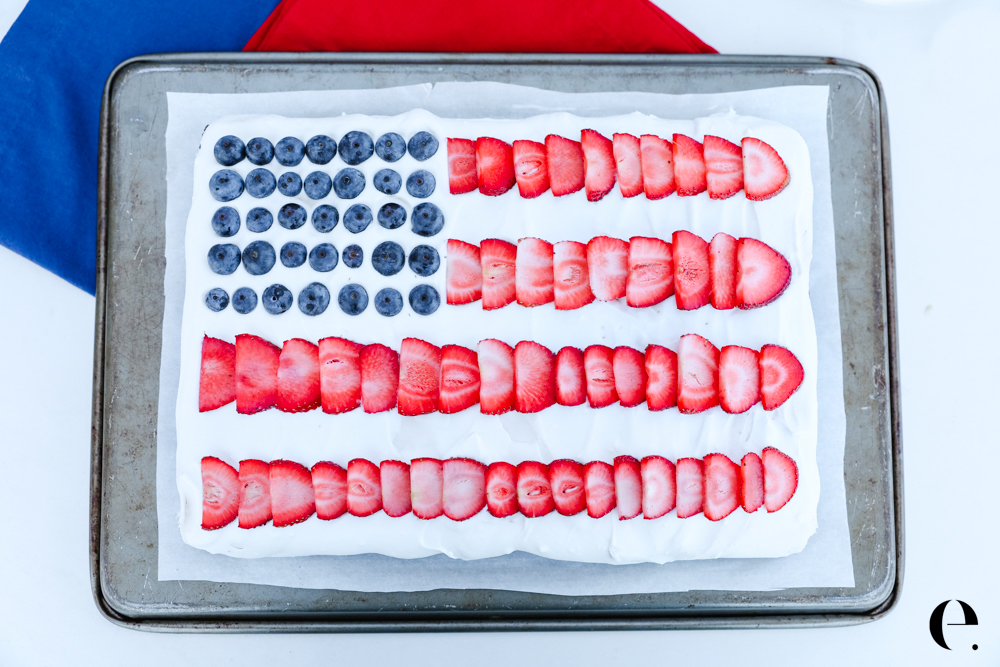
No cake stand? No problem. Flip a sheet pan over and cover it with parchment paper to create your own DIY cake stand.
How to Make a 4th of July Flag Cake
See the full recipe and tips in the printable recipe card below.
Here is how to put it together. The whole thing is really about timing and arranging the berries neatly:
- Make or buy your cake the day before. It needs to be completely cool before you decorate, so I always make it the day before or first thing in the morning. Let it sit at room temperature or in the fridge, covered with a clean kitchen towel.
- Make your whipped cream a few hours ahead. Whipped cream settles a little over time, so I make my coconut whipped cream about three hours before we eat. If we are eating at 6, I am whipping it around 3.
- Set up your platter. I like to take the cake out of the pan to show it off. At our lake house I do not have a cake stand, so I flip a baking sheet over and top it with parchment paper for an instant platter. You can also just leave the cake in the pan.
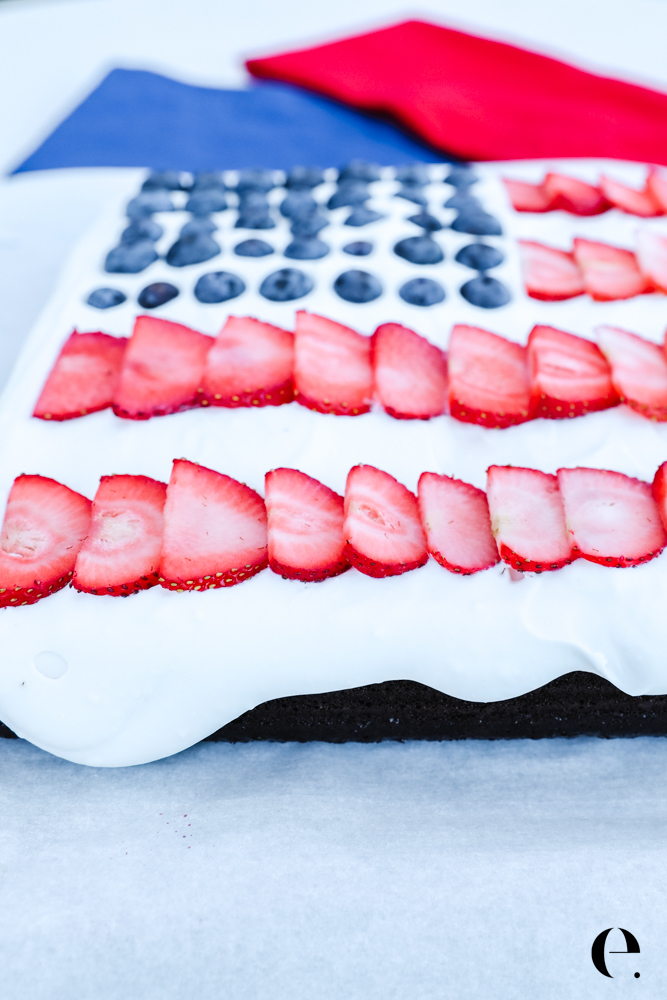
- Spread the cream. Add about two cups of whipped cream to the center and gently spread it to the edges, letting it fall naturally for a pretty border. Keep extra cream in the fridge so people can add more to their slice.
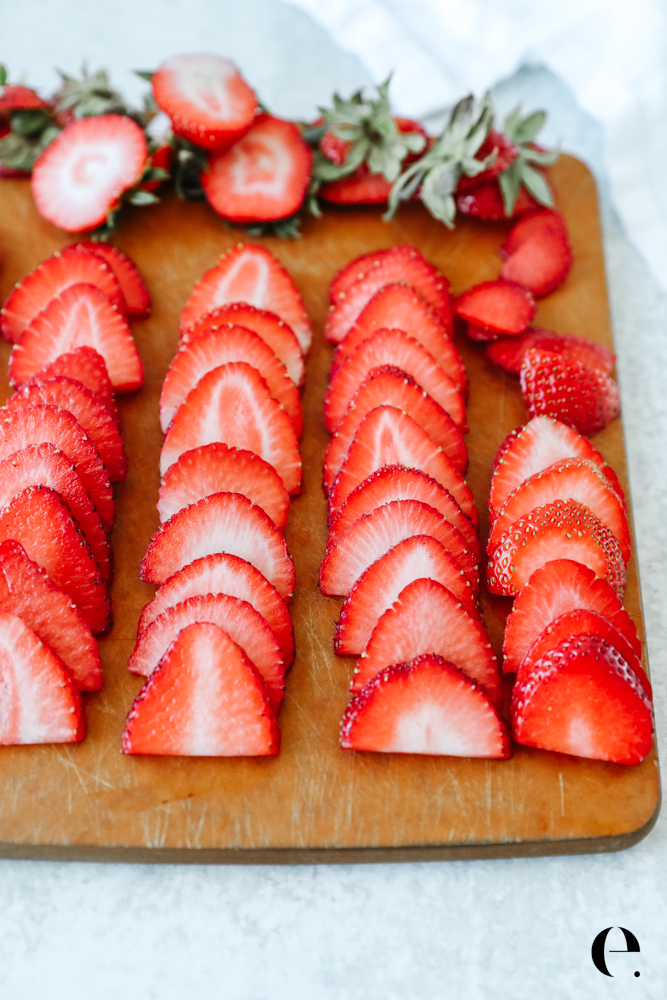
- Build the flag. Make a square of blueberries in the top-left corner, then use sliced strawberries for the red stripes. On a 9×13 cake I do about 5 rows of 7 blueberries, then 4 to 5 rows of strawberries.
- Arrange the berries facing the same direction. This is the one step that turns a cute cake into a stunning one. Slice all your strawberries the same way and line them up so they all face the same direction. It feels fussy, but it is what makes people gasp when you carry it out.
- Chill until you are ready to serve. This cake is best slightly chilled. It is fine at room temperature for a few hours, so do not panic if your fridge is packed, but keep it cool if you can, especially when it is hot out.
How to Serve This 4th of July Flag Cake
This one is made for a crowd and a sunny afternoon. Here is how I like to serve it:
- Slightly chilled, straight from the fridge, with a little extra whipped cream on the side
- Cut into squares so it is easy to hand out plates at a busy cookout
- Right after the rest of the spread, like burgers and herby potato salad
- With a few sparklers on top for the kids just before you bring it out
To make it gluten-free or dairy-free, just choose a cake mix that fits. The coconut whipped cream is already dairy-free, egg-free, and soy-free, so the rest of the dessert works for almost any preference.
How to Store Your Flag Cake
Store any leftover flag cake covered in the fridge for up to 2 days. The whipped cream softens and the berries release a little juice over time, so it is prettiest and tastes best the day you make it. I do not recommend freezing this one, since the cream and fresh berries do not hold up. If you want to get ahead, you can decorate it the night before and keep it chilled, and it still looks great the next day.
4th of July Flag Cake with Whipped Cream
- Prep Time: 35 minutes
- Total Time: 35 minutes
- Yield: 12
- Category: Dessert
- Method: Mix
- Cuisine: American
Description
This easy 4th of July flag cake is the prettiest, simplest dessert for your cookout. A cooled cake topped with chilled coconut whipped cream and fresh blueberries and strawberries arranged into an American flag. One of the best, healthiest 4th of July desserts, and the kids love to help.
Ingredients
- (1) 9×13 sheet cake (from a box, bought at the store, or homemade)
- 2 cups thick coconut whipped cream (or any thick whipped cream of your choice)
- 1 pint strawberries, sliced
- 1 pint blueberries (you’ll need about 35-45 blueberries depending on their size)
Instructions
- Bake the cake the day before. Make sure it’s completely cooled before using. Use a cake mix that fits any allergy or dietary needs.
- Tip: always add 1/4 teaspoon extra vanilla extract to boxed cake mix to make it taste even better.
- Add 2 cups of coconut whipped cream to the cake and smooth to the edges. Use more as needed.
- At the top left, make the blue “stars” with 5 rows of 7-8 blueberries depending on their size. Take care to face all of the blueberries the same way for symmetry (it will make your cake prettier!)
- Cut off the green tops of the strawberries, place the flat cut top down on the cutting board, then slice your strawberries (the long way) about 1/8 to 1/4 inch thick. Aim to make most of your strawberries the same size if possible. Place them in rows for the “stripes” all facing the same way for symmetry.
- Chill your cake until you serve it. Save the leftover whipped cream if there is any to the side so people can spoon more on if they’d like.
- Enjoy!
Notes
No cake stand? No problem. Flip a sheet pan over and cover it with parchment paper to create your own DIY cake stand.
Frozen berries will bleed into the whipped cream, so use fresh berries for this cake.
4th of July Flag Cake FAQs
Can I make this 4th of July dessert ahead of time?
Yes. You can bake or buy the cake the day before, and you can even fully decorate the cake the night before and keep it chilled. The whipped cream settles slightly overnight but still looks beautiful the next day. For the freshest look, decorate the morning of or a few hours before serving.
What cake works best for a flag cake?
Almost any cake works. I love a simple yellow cake, but chocolate, angel food, or a pan of brownies are all delicious under the cream and berries. Use a box mix, a bakery cake, or a from-scratch recipe. The flag decoration is what makes it special, not the cake underneath.
How do I make this a healthier 4th of July dessert?
Use coconut whipped cream instead of heavy store-bought frosting, choose a cleaner cake mix, and pile on the fresh fruit. Berries bring real nutrition to the party. Strawberries are an excellent source of vitamin C, with roughly 85 mg in one cup, more than a whole orange, according to USDA FoodData Central. Small swaps like these keep it lighter without anyone feeling like they are missing out.
Can I use frozen berries?
No, use fresh berries here. Frozen blueberries and strawberries release a lot of juice as they thaw and will bleed color all over your white whipped cream. Fresh berries keep the flag crisp and clean.
Is this dessert gluten-free and dairy-free?
It can be both. Coconut whipped cream is naturally dairy-free, egg-free, gluten-free, and soy-free. Just choose a cake mix that matches your needs and the whole dessert works for almost any dietary preference.
How far ahead can I whip the coconut whipped cream?
Make it up to a few hours ahead. I usually whip mine about three hours before serving. It holds beautifully in the fridge, and making it ahead actually helps it set up so it spreads cleanly on the cake.
If you love having recipes like this organized and ready when you need them, that is exactly why I built the Butler app. It keeps all your recipes and meal plans in one place, so deciding what to make never feels like a chore.
More 4th of July Recipes
Homemade Rocket Popsicles
A super easy, healthy take on the classic red, white, and blue rocket popsicles. These refreshing homemade summer treats are made with fresh strawberries and blueberries, and creamy coconut milk. They’re vegan and gluten-free.

The Best Macaroni Salad for Summer BBQs
Macaroni Salad is a classic American summer side dish. I lightened it up with tangy vegan mayo, but any mayo works. It comes together in about 25 minutes, and it’s best when it sits in the fridge for a few hours to come together. Enjoy!
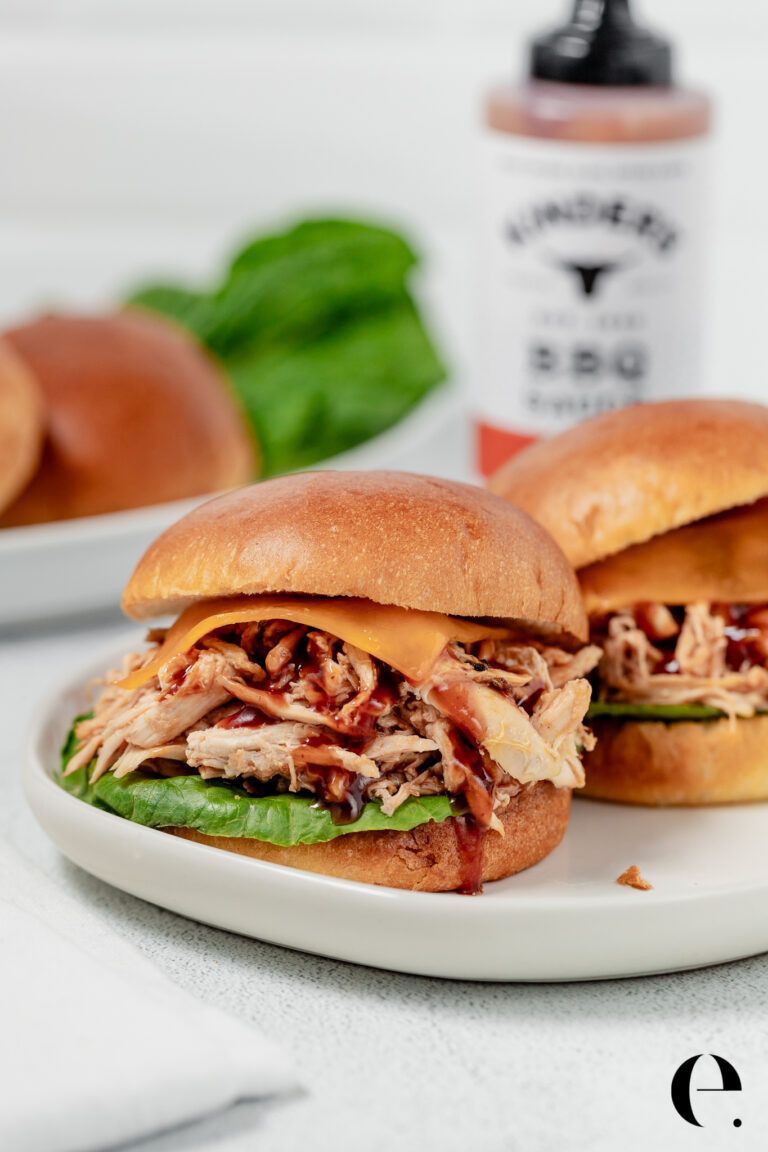
Rotisserie Chicken BBQ Sandwiches
These Rotisserie Chicken BBQ Sandwiches are the ultimate 10-minute dinner. Shredded rotisserie chicken gets tossed in your favorite BBQ sauce, then layered with crisp lettuce and melty cheddar on a toasted brioche bun. It’s a simple, satisfying meal that’s perfect for busy weeknights or casual gatherings.
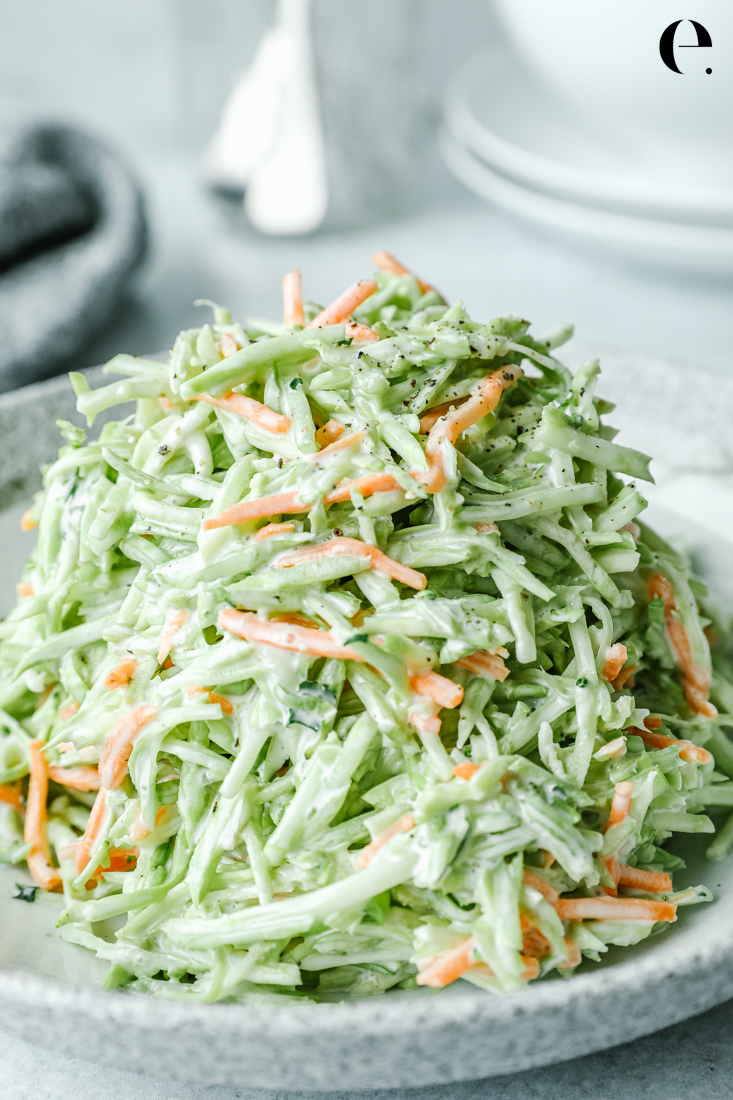
The Best Broccoli Slaw (5-Minutes!)
This incredible broccoli slaw recipe makes about 4 cups, which is about 8 servings. It comes together in about 5 minutes and is a total crowd pleaser! It’s easily doubled or even tripled for a crowd. If you love it, please leave a star rating in the comments here to help other readers in our community.

Easiest Homemade Coleslaw Recipe (5 Minutes or Less)
This easy homemade coleslaw recipe comes together in just minutes with shredded cabbage, mayo, vinegar, sugar, salt, and pepper. A classic creamy coleslaw perfect for summer BBQs, burgers, tacos, and easy dinners.

Healthy Potato Salad with Dill & Chives (No-Mayo)
This No-Mayo Potato Salad recipe is an all-time favorite. Loaded with chives & dill and tossed in a tangy dressing that soaks in the potatoes, you won’t even miss the mayo. It’s the perfect potato salad side dish for any occasion.
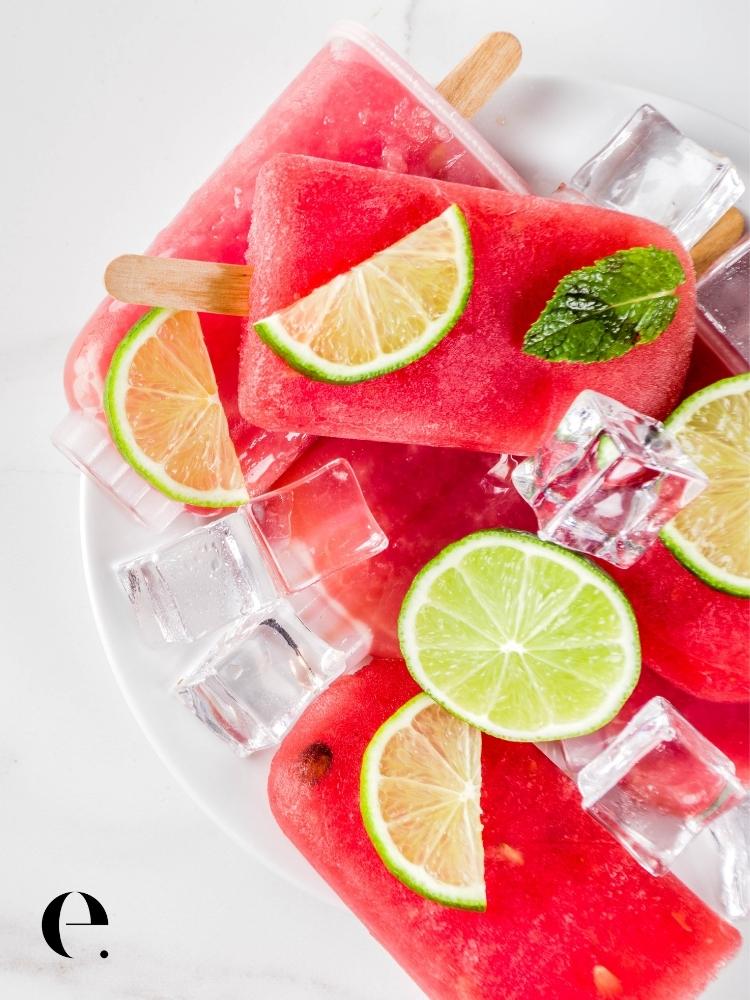
Watermelon Popsicles Recipe
Nothing says summer like watermelon! And nothing goes better with watermelon than mint, which means watermelon mint popsicles are the best summer treat!

The Best Skinny Watermelon Margarita
This Skinny Watermelon Margarita is a low-sugar cocktail and the perfect way to savor the natural flavors of your ingredients while enjoying a moment of relaxation. It’s light, flavorful, and just right for sharing on any sunny day.
")


")
0