


If you haven’t ever made homemade ice cream, then you’re totally missing out.
Not only is this homemade ice cream incredibly easy to make, but it’s also vegan to boot (but I PROMISE, it doesn’t even taste vegan!). No one will ever know. I’ve made this for a number of friends that couldn’t believe that it’s vegan after tasting it, and kids love it, too.
An easy recipe that is also secretly healthy? It’s a win-win for everyone.
But why is this homemade ice cream method better?
The thing is that traditional homemade ice cream requires you to slave over a custard on the stove, and I don’t know about you, but the “watching-the-custard-on-the-stove” method and trying not to mess it up feels like too much work and leaves too much room for error.
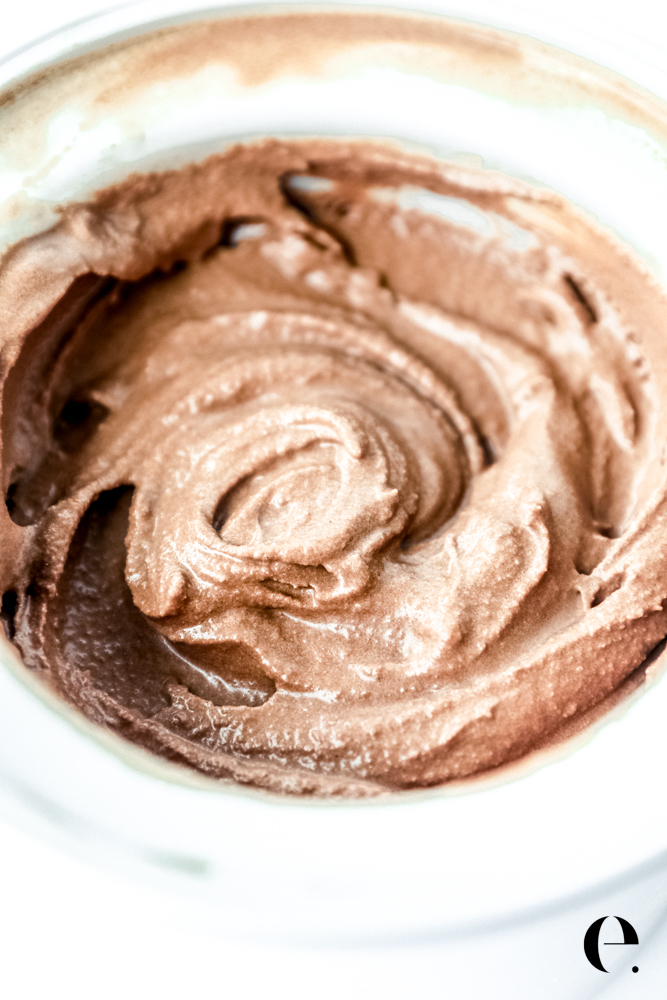
With my homemade ice cream method, just blend up 4-5 ingredients until smooth at room temp, then pour it into a frozen ice cream maker. Easy-peasy.
So, yes, you need an ice cream maker for this, but if you love ice cream, get one. They have come down in price so much in recent years; I think I even got mine on Amazon Prime Day for a crazy price. I use this one. You can also find them at most kitchen stores. If you don’t have one, read my tips at the bottom to still make this.
Simple Homemade Ice Cream Ingredients
As I mentioned above, the chocolate version of this recipe only needs 5 simple ingredients (and the vanilla version only needs 4!)
Coconut Milk (You can’t even taste it!)
Be sure to use full-fat coconut milk as the reduced-fat version or stuff in the carton won’t set. I typically don’t like the flavor of coconut, and with the other ingredients here you can’t even taste it. This recipe takes like good ‘ol fashioned chocolate ice cream (and it’s way easier to make).
Sweetener + Flavorings
I like to use maple syrup as it’s a natural sweetener, but you can use 1 cup of sweetener of your choice. I also use raw chocolate powder (also known as cacao) for its extra antioxidant power. It has an earthy, strong chocolate flavor as it’s simply unroasted cocoa. As always, I recommend choosing the healthiest ingredients you can.

Tips for the Best Homemade Ice Cream
- Make sure your mixture is smooth and not hot before you pour it into the ice cream maker. I like to just blend it up for about 20 seconds in a blender to make it smooth, but don’t blend it so long that it’s hot. Room temp is ok, and pop in the fridge for a few minutes if it gets warm. You don’t want to pour a warm or hot mixture into your ice cream maker.
- Get creative with the flavor! You could replace the 2/3 cup of cocoa powder here with 1/2 strawberries or other fruit or flavor it how you’d like. Use the 2 of cans full fat coconut milk, maple syrup, vanilla, and sea salt as your base, then add 1/2 cup to 3/4 cup of your favorite flavor to make this homemade ice cream your own.
- Always follow the instructions specific to YOUR ice cream maker. They are generally super easy to use and take about 20 minutes for your frozen dessert to come together. Then, store it in a double-walled container (I use this one). The double-walled container is important to prevent your ice cream from turning into a solid frozen block, which is the same reason you need the ice cream maker in the first place.
Can I make this without an ice cream maker?
In short, I don’t recommend it. BUT, there is a way to get it close to ice cream texture.
First, for the same reason I mention the double-walled container above, if you just pour the mixture into a bowl and freeze it, you’ll end up with a big frozen chunk. I don’t recommend doing that. The ice cream maker is your best bet if you can use one.
However, if you don’t have one or can’t get one, you can try this:
- Use a shallow glass or metal container (a 9×13-inch baking pan would be great) and pour a shallow layer of the mixture in the pan.
- Put it flat in the back of your freezer.
- About every 30 minutes for the next 3 hours, quickly stir it with a rubber spatula as it freezes.
- After 3-4 hours of stirring it every 30 minutes, you should have frozen-yogurt-style ice cream.
- This method isn’t full-proof, but it does often work. There are too many variants (the actual temperature of your freezer, ingredients, size of pan, natural climate, etc.) to make sure it works every time, but give it a try if you want to be creative without the ice cream maker. If anything, you can just sip the cold mixture as a dessert or use it to make a smoothie (it will still be delicious, just not ice cream).
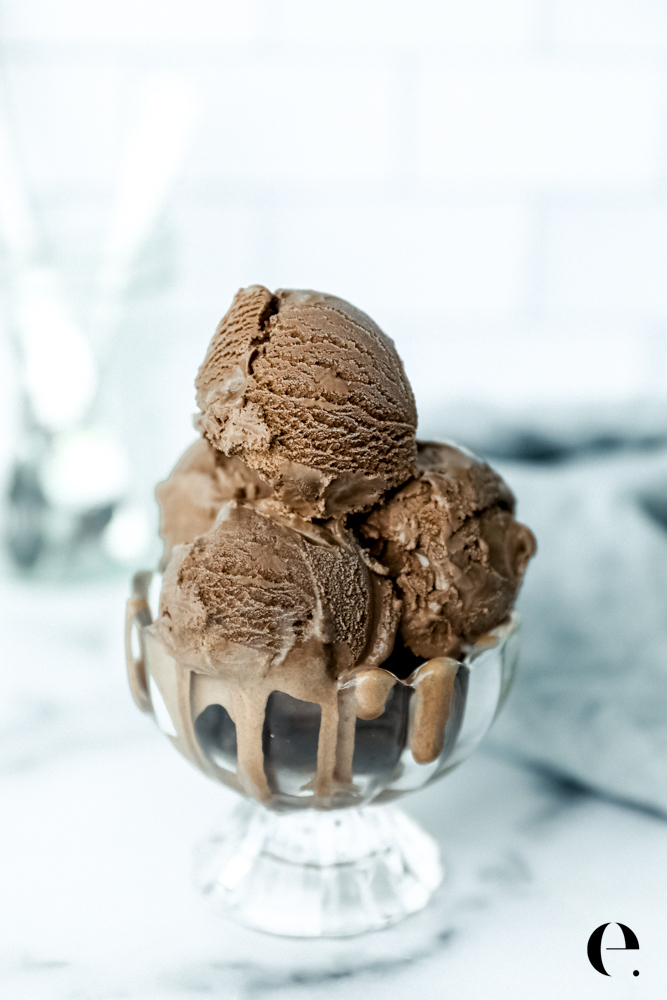
The Best Homemade Ice Cream Recipe
- Prep Time: 10 minutes
- Cook Time: 20 minutes
- Total Time: 30 minutes
- Yield: 8 servings
- Category: Dessert
Description
Homemade ice cream is easy and absolutely delicious! We love this easy blender version that doesn’t require making a custard on the stove (and we can’t even taste the coconut milk). If you like this recipe, please leave a star rating in the comments section of this post to help other readers in our community!
Ingredients
- 2 (14-ounce) cans full-fat coconut milk
- 2/3 cup raw chocolate powder (aka cacao) or cocoa powder of your choice
- 1 cup maple syrup (or substitute sweetener of your choice)
- 2 teaspoons vanilla extract
- 1/4 teaspoon fine sea salt (I use Real Salt)
- Optional: add 1 teaspoon instant, freeze-dried coffee to enhance the chocolate flavor if making the chocolate version
Instructions
Short Explanation:
Blend all ingredients together in a high-speed blender or whisk by hand in a mixing bowl until smooth, then follow the instructions on your ice cream maker.
More Details:
In general, you’ll set up your ice cream maker, put the frozen bowl on the stand, add the middle paddle, and place the cover on. Turn it on, then pour the mixture into the frozen bowl. Be sure the bowl of your ice cream maker has been in the freezer for at least 24 hours and use it immediately once you remove it from the freezer as they start to thaw quickly.
Mix for 20 to 30 minutes or according to the ice cream maker instructions (always follow the instructions on your ice cream maker).
Enjoy immediately (it will be more of a frozen yogurt texture, or transfer to a double-walled ice cream container and freeze for at least five hours or overnight for scoopable ice cream.)
Important! Do not leave it in the bowl with the mixing paddle—the paddle will freeze right into the mixture once you turn the ice cream maker off.
Keeps in a covered double-walled container in the freezer up to 3 months. (But who are we kidding, we usually eat it within a day or two.)
If you don’t have an ice-cream maker, see the alternative tip below.
Notes
If you don’t have an ice cream maker:
- Use a shallow glass or metal container (a 9×13-inch baking pan would be great) and pour a shallow layer of the mixture in the pan.
- Lay it flat in the back of your freezer. About every 30 minutes for the next 3 hours, quickly stir it with a rubber spatula as it freezes. After 3-4 hours of stirring it every 30 minutes, you should have frozen-yogurt-style ice cream.
Vanilla Variation:
- Leave the chocolate (cocoa powder) out and use one full tablespoon of vanilla extract. Omit the instant coffee powder.
Other Flavors:
- Get creative with the flavor. You could replace the 2/3 cup of cocoa powder here with 1/2 cup strawberries or other fruit or flavor it how you’d like. Use the 2 of cans full fat coconut milk, maple syrup, vanilla, and sea salt as your base, then add 1/2 cup to 3/4 cup of your favorite flavor to make this homemade ice cream your own.
If You Like This Recipe, Also Check Out:
Healthy Chocolate Avocado Mousse
2-Ingredients Banana Ice Cream
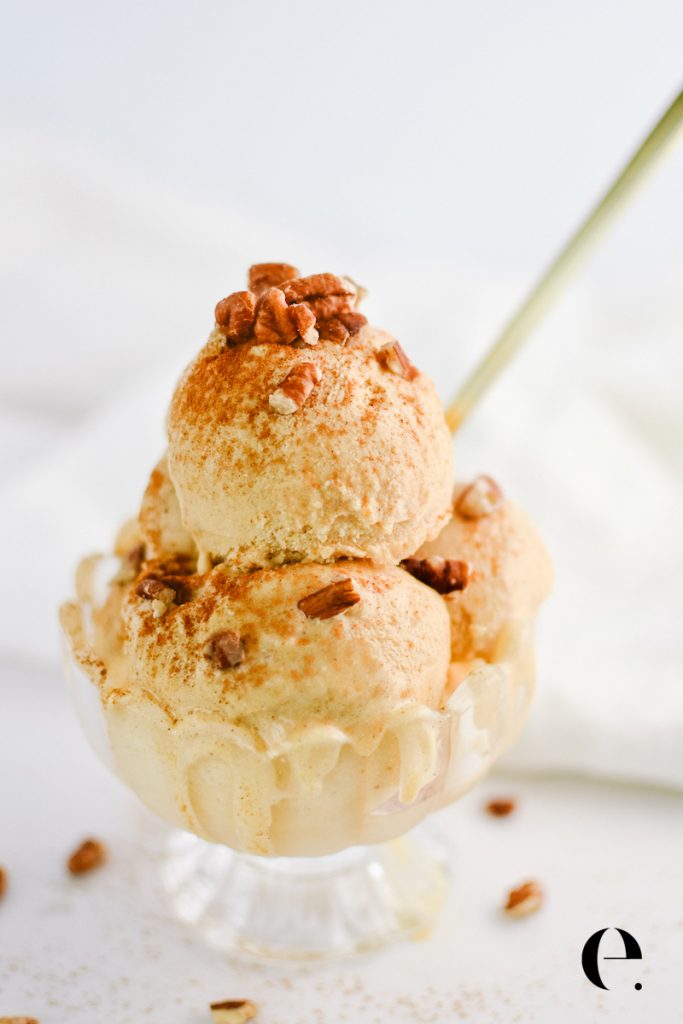
Pumpkin Spice Ice Cream Recipe
")


")
This dairy free homemade ice cream recipe is creamy and delicious—totally worth trying!.
I have been making the chocolate version of this for a few years now and I love it! I tried the vanilla version this year and it was good too. However, this month I tried making 2 fresh fruit versions and they did not turn out well. Both times I blended some of the fruit in the mix while reserving some to drop in chunks after the ice cream was in the maker. With peaches especially I had problems with the coconut milk separating and clumping, completely ruining the texture. Both times, even though I used more fruit than the recipe called for, the flavors of the coconut milk, vanilla and maple syrup completely overpowered the fruit. Any suggestions? I haven’t tried using strawberries yet. Apparently that has worked for some. Would it be better to use frozen fruit, or to not blend it with the mix and just drop it in after it starts freezing?
My daughters and I LOVED this recipe! We made the chocolate and a strawberry version. So excited to try more!